Can You Drink Coffee With A Retainer In? (Invisalign & More)
Retainers exist for a number of different reasons, whether it’s keeping your teeth in place after braces or slowly creating your new smile with Invisalign.
Since they play such a large role in shaping and maintaining your new smile, it is very important to take proper care of them (and your teeth!) to make sure you get your money’s worth.
With the average time your retainer should be worn after having braces clocking in at 22 hrs a day, it’s inevitable to want to enjoy a coffee or other beverage while wearing one.
While it is good practice to always remove your retainer before eating and drinking anything besides plain water, sometimes that’s just not an option!
So, today we are delving into retainer basics, how to properly clean and maintain one so you can have good oral hygiene , and answering one of the most common questions….
Can you drink coffee with a retainer in?
Table Of Contents (Just click on the section you want to read!)
Potential impacts of coffee on your retainer
The staining potential of coffee
The impact of high acidity and sugar
Reducing the impact coffee has on your retainer
So, you drank coffee with your retainer in… now what?
Conclusion: Can you drink coffee with your retainer in?
Let’s Dive into Retainer Basics
Firstly, lets learn a bit more about retainer basics, such as what they’re made of and so on.
There are three main types of retainers on the market right now:
#1 The Hawley Retainer
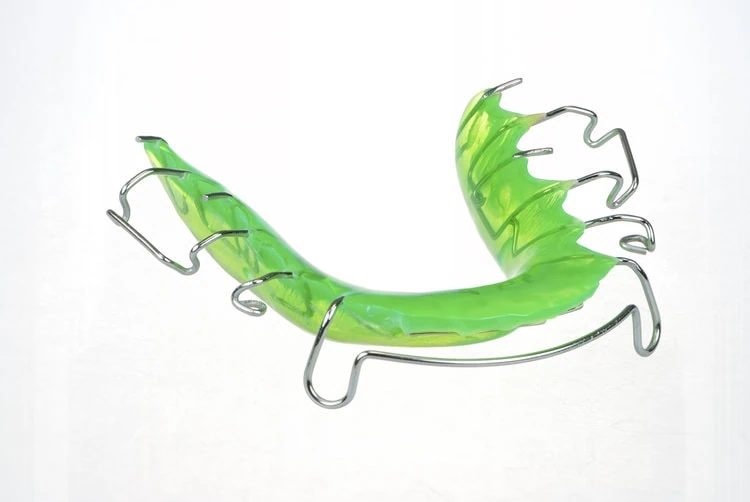
The Hawley Retainer is going to be your go-to classic removeable retainer.
Made out of acrylic and metal and perfectly molded to your fit your post braces teeth, this is one of the most common retainers out there.
One of the benefits of this retainer is you can choose what color you want it to be, or even put a pattern on it.
I even had mine customized with the logo of my high school!
#2: Clear Retainers / Clear Braces
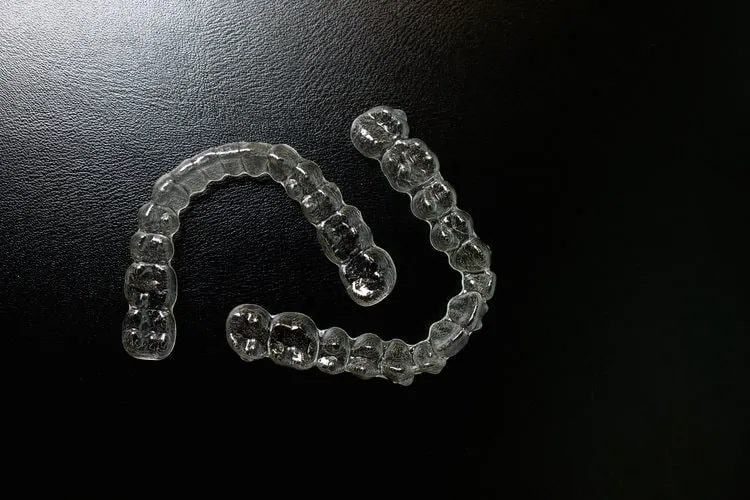
Clear retainers have quickly become one of the most common removable retainers out there. these ones act both as a retainer but also can an alignment tool.
While you probably most likely know this type of retainer as part of the Invisalign treatment program but there are actually two types of retainers that fall into this this category.
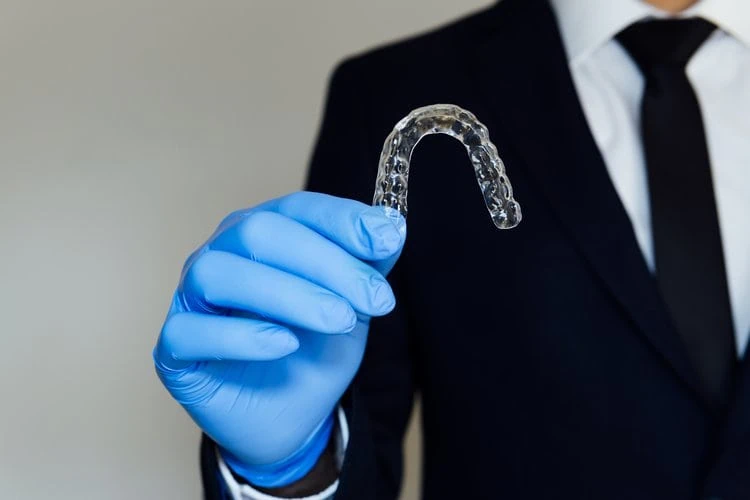
Both Essix retainers and Vivera (Invisalign) retainers are made out of clear, durable, thermoplastic that has been named “Smart Track”.
They are molded to the user’s teeth perfectly and when maintained well, are almost invisible.
The main difference between the two is the thickness of the retainer.
Essix retainers are actually 30% thinner than Vivera retainers, leading to them warping and distorting much easier than the Invisalign trays.
#3 Permanent or fixed retainers
The last common type of retainer on the market is a permanent or fixed retainer.
These are made of metal and some type of bonding material that fits the metal wire to the teeth.
You’ll typically find these behind attached to the back of your bottom teeth or behind your top teeth.
While you most likely still need to wear a removable retainer after having braces, having a permanent retainer substantially minimizes the amount of tooth movement over time.
The only major downside to these permanent retainers is that they can be very difficult to keep clean.
Food particles commonly get stuck in between the teeth under the wire and are difficult to properly get out.
Potential Impacts Coffee May Have on Retainers
While you can drink water and other drinks while having your retainer in, drinking coffee, especially hot coffee, poses a few different risks for your retainer.
1. The Staining Potential of Coffee
One of the biggest concerns with drinking coffee while having a retainer in is the staining potential.
Similar to red wine, coffee has the ability to stain a variety of materials such as linens, plastics and even our teeth.
This staining property comes from the tannins found in coffee.
When these are present, the color compounds in coffee (aka the brown color) has the ability to stick to things, leading to stained teeth and potentially a stained retainer.
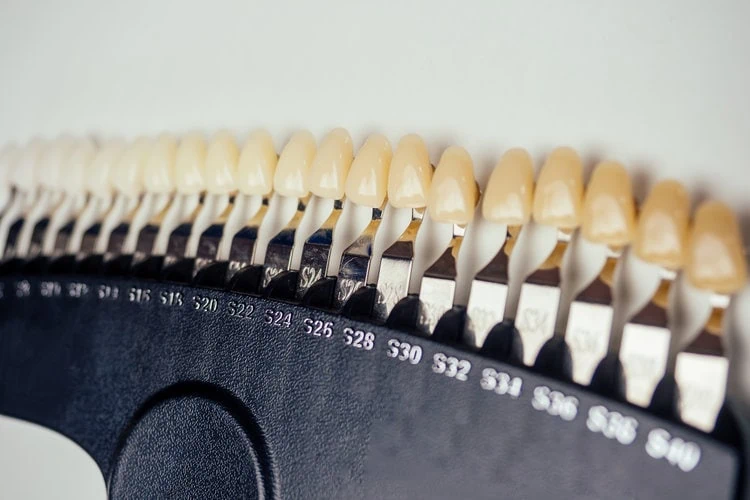
While we have some ways to get stains out of our teeth such as teeth whitening, it can be a bit more difficult to get the coffee stains out of plastic materials.
Plastic materials tend to be much more porous and thus really absorb that lovely brown coffee color.
While it may not be a huge deal that your colored removable retainer picks up a bit of coffee stain, it may be a bit more noticeable for those using Invisalign retainers as they’re completely clear.
With the whole point being that the retainer is “invisible”, you don’t want to turn them yellow!
2. The Impact of a Hot Coffee
The second main concern when drinking coffee with a retainer in is how the heat from the coffee might affect the materials the retainer is made of.
Experts state an ideal cup of hot coffee will be served at a temperature between 180 and 185 F.
From my barista experience, we steamed milk to around 140 F, so we will say the average coffee temperature ranges from 140-180 F.
When it comes to both Hawley retainers and clear (Essix & Vivera) aligners, the melting point for the plastics used sits around 300-320 degrees Fahrenheit.
Again, for average cup of coffee, you’ll be hitting around 140-180 degrees Fahrenheit, so around halfway to the plastics’ melting point.
Although the heat from your coffee will not melt the material, it can definitely weaken the plastic material leading to deformation, which would unfortunately defeat the point of your retainer!
Also remember the Essix retainers are much thinner than the similar Invisalign aligners, so having hot drinks with this retainer may cause deformation quicker than the alternatives.
3. The Impact of High Acidity & Sugar
The last factor to take into consideration is the high acidity and potentially high sugar content of your morning coffee.
While we talked about how tannins can cause staining on your teeth and retainer, we haven’t talked about how the sugar/acid combination can affect your retainer and oral health.
Coffee is considered a pretty acidic drink, sitting at about a 4.85-5.1 on the pH scale.
This isn’t surprising as coffee beans actually contain nine different acids.
Chlorogenic acid is the most prevalent followed by quinic, citric, acetic, lactic, malic, phosphoric, linoleic, and palmitic acids.
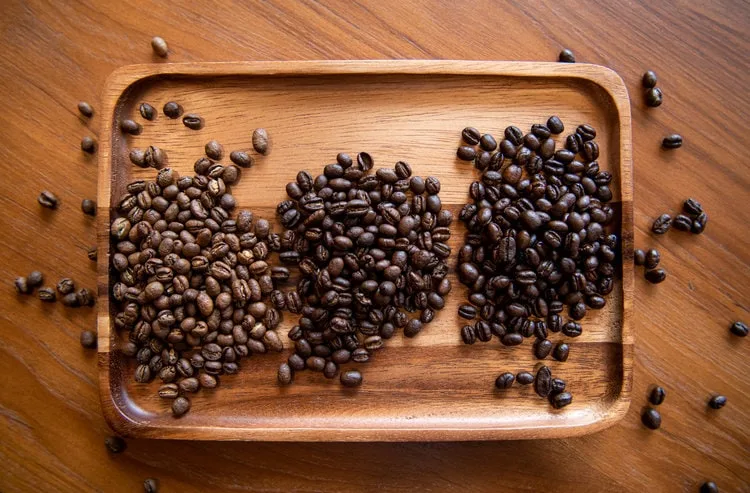
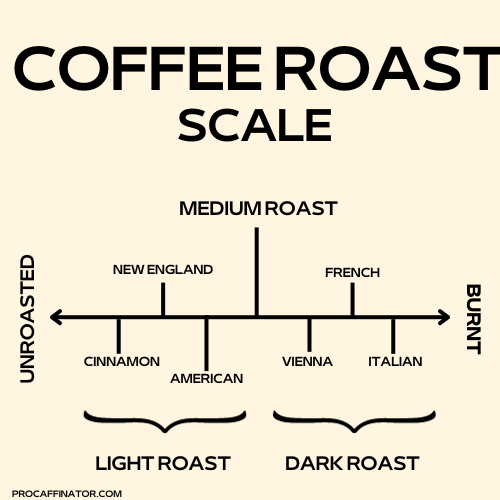
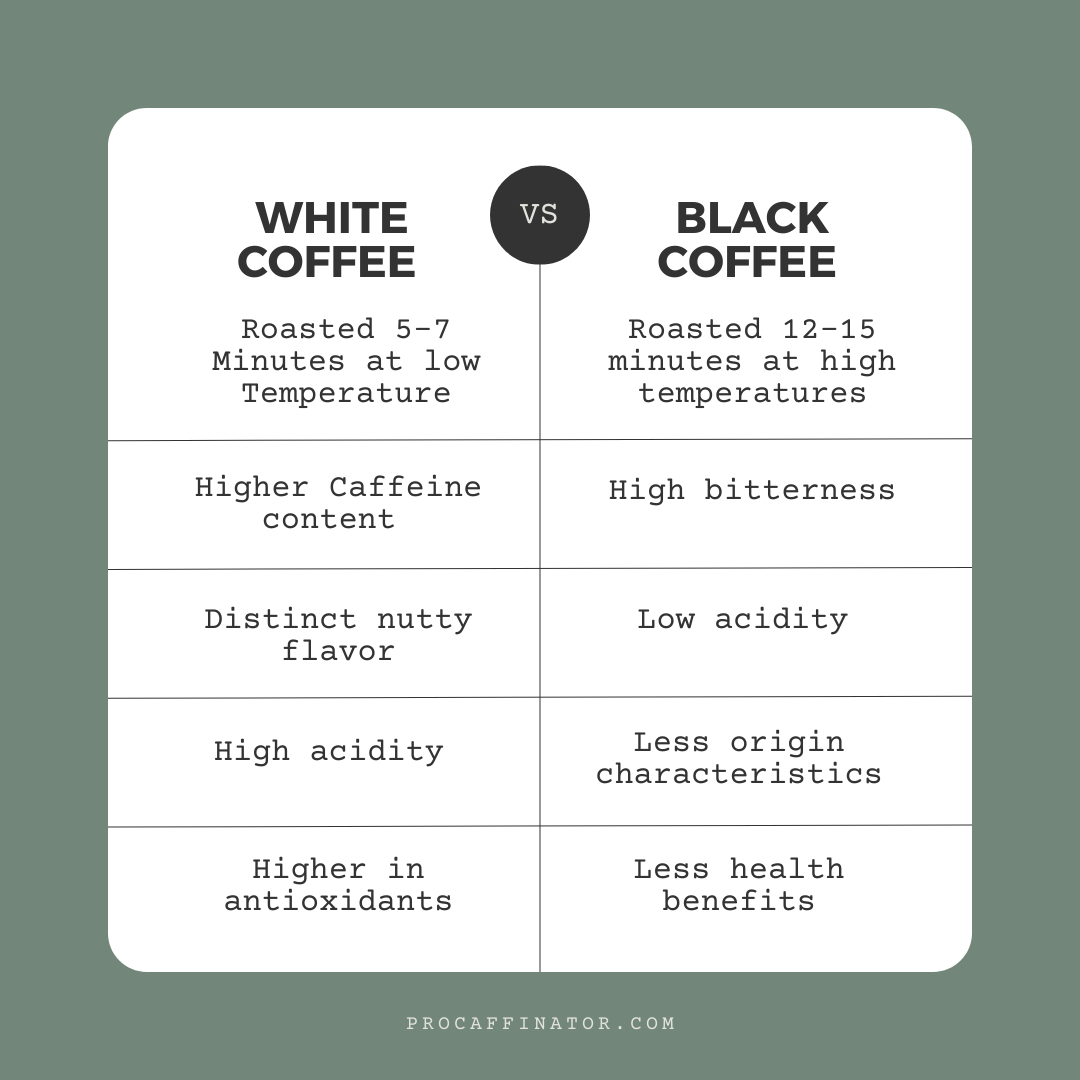
These acids tend to come out more in the flavor profiles of lighter roast coffees as the beans aren’t in the roaster long enough to burn off these acids.
While the acidic nature of the delicious drink may not have an immediate effect on your retainer, overtime without proper cleaning, the exposure to the high acids can eat away at the plastic and acrylic materials.
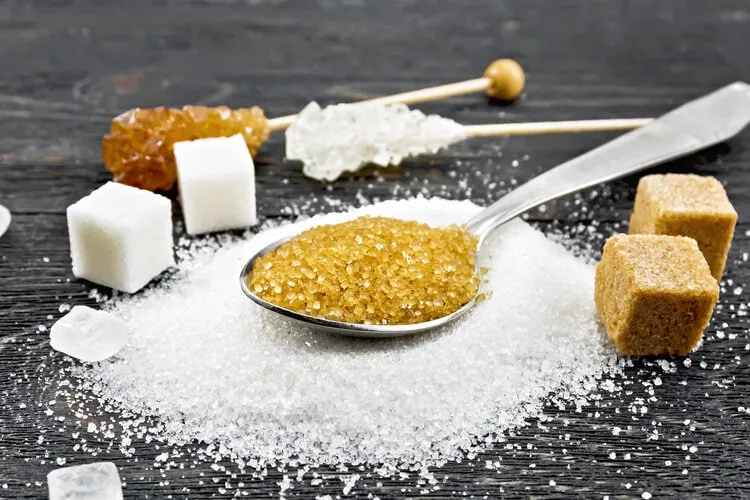
The impact of sugar on the other hand, mainly poses a problem for your pearly whites.
Sugary drinks are known to cause tooth decay if the teeth are not properly taken care of.
This risk is only increased when wearing a retainer that traps the sugary drink right next to your teeth for a long period of time.
Additionally, when your retainer is also exposed to sugar, it can become a breeding ground for bacteria.
This can not only make the retainer harder to clean and maintain, but also can lead to bad breath and overall bad dental health.
How to Reduce the Potential Problems from Drinking Coffee with a Retainer In
Now, if you absolutely need to have a coffee with your retainer in, don’t worry!
There are a few fixes to help minimize the risks of damaging or discoloring your retainer.
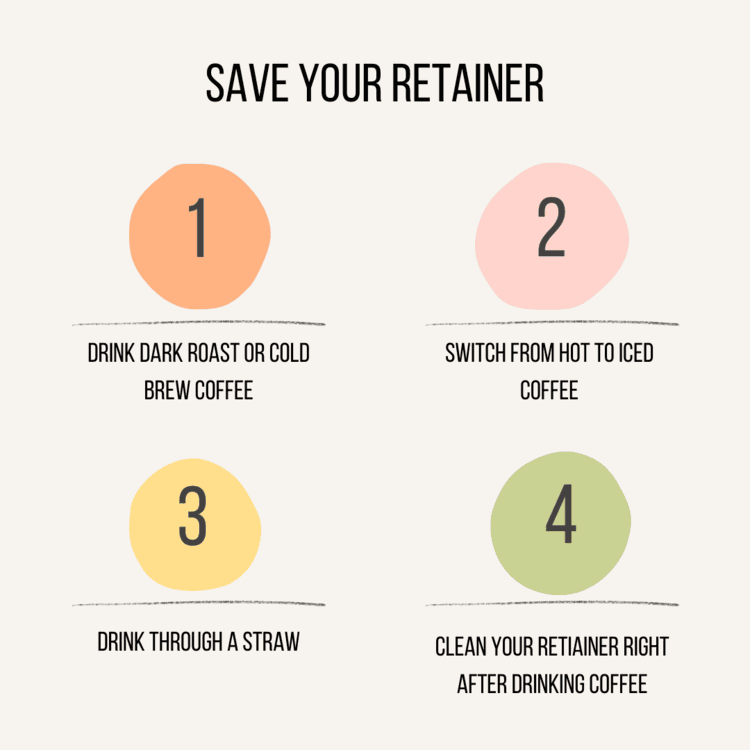
1. Choose a darker roast coffee
We briefly talked about this earlier, but light roast coffee tends to carry a much stronger acidic profile than dark roast coffee.
For a reference, a lighter roast coffee may have a pH closer to 4.85 while a darker roast will be around 5.1 on the pH scale.
This is due to the amount of time they’re roasted for but also the temperature that the beans are roasted at.
Since dark roast coffee is roasted for a longer period of time at a higher temperature, a lot of the acids in the coffee beans are broken down.
2. Drink a cold brew coffee instead of a hot coffee
This quick swap has 2x the benefits.
Not only does switching to cold coffee help prevent warping and distortion of the retainer itself, but cold brew coffee is actually 66% less acidic than a normal hot coffee.
3. Use a plastic or metal straw to drink from
When you use a straw, the majority of the liquid you’re drinking bypasses your teeth and thus your retainer.
This can help prevent any liquid from getting trapped between your teeth and retainers.
So you drank coffee with your retainer in…now what?
Drinking something you’re not supposed to while having a retainer in isn’t a good idea, but it’s definitely not the end of the world!
Since the main concern when it comes to drinking coffee with a retainer in is staining, the next steps are to give it (and your teeth) a nice deep clean.
Cleaning Clear Retainers
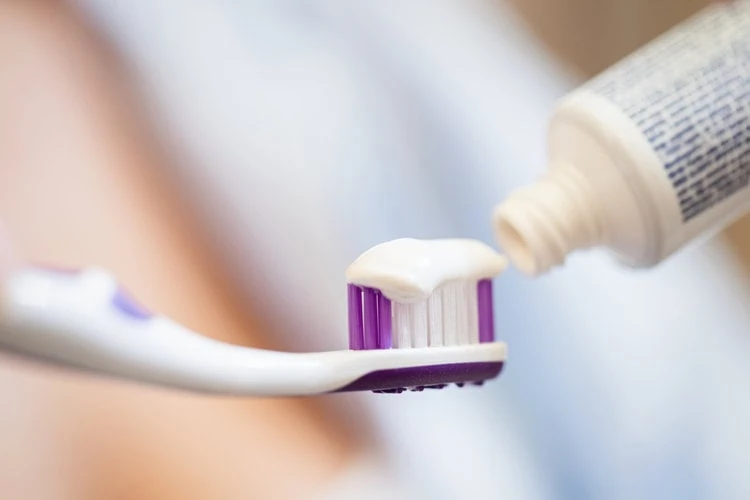
Surprisingly, using toothpaste is actually not recommended for cleaning your clear retainers due to
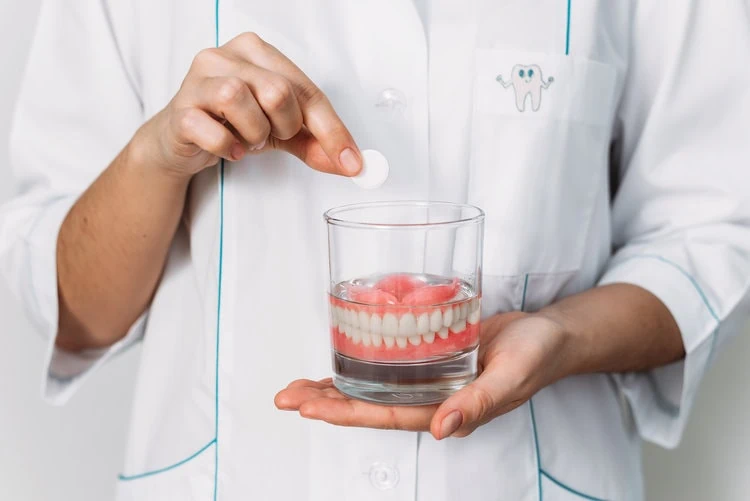
Instead, soaking them in cold water (do not use hot water!! this can deform them quickly) with a cleaning tablet specifically for retainers or dentures.
If you want to be extra careful, you can use an approved cleaner, like WhiteFoam. This is a cleaner that was made for clear retainers specifically.
It is also recommended against using mouthwash or any colored cleaners on these as keeping the clear look is the most important thing.
Cleaning Hawley Retainers
Thankfully, it is a bit easier to keep your Hawley retainers clean.
Since these removable retainers are made of hard plastic and wire, all you really need to do is soak them in cold water and give them a good brush to keep clean.
Similar to clear retainers, you can add in a retainer cleaning tablet to the water to give them an even deeper clean.
Note: It is recommended to not soak them for more than 15 minutes.
Cleaning Your Permanent Retainer
Since your permanent retainer is well… permanent, you’re going to drink coffee with it in at some point (unless you decide to quit completely).
Thankfully since it’s hidden behind your teeth, appearance doesn’t matter at all.
But it is still important to keep up your dental hygiene especially with this type of retainer.
It can be very difficult to floss between your teeth since the wire is in the way, which can lead to bad oral hygiene as food particles and sugars are much more likely to stay trapped between your teeth.
Using a flossing needle is the way to go as it provides an easy way to get floss in between your teeth to keep your smile gorgeous!
Conclusion: Can You Drink Coffee With Your Retainer in?
Especially in the winter, it may be tempting to enjoy a hot coffee, or even a hot chocolate while you have your retainer in.
However, it is definitely recommended to not have any hot liquids or any coffee while your retainer is in.
There are three main reasons for the concern of drinking coffee with a retainer in:
1. Staining / Discoloration of the retainer
2. Warping / Deformation
3. Damage to the retainer from acids / sugars in your favorite beverage
Staining & discoloration is by far the biggest concern when it comes to drinking coffee.
This is mainly because coffee contains tannins, which cause the brown coffee color to stain and hang onto a lot of different materials (including teeth!).
As clear plastic retainers have become increasingly popular in the last few years, having a stained or cloudy retainer would defeat the purpose of them completely.
The best way to combat potential retainer staining and general wear is by getting into a good cleaning routine.
While it is easy to clean a Hawley (hard removable retainer) by soaking it in cold water and giving it a gentle brush, Invisalign wearers have it a bit harder.
The process of cleaning Invisalign retainers or an Essix retainer proves a bit more complicated as you are unable to brush them.
It is recommended to use a retainer cleaning tablet when soaking them in water and to avoid using a colored cleaners (such as mouthwash) or even toothpaste as it could create tiny scratches on the plastic leading to a cloudier look.
If you absolutely need to have a coffee and can’t take your retainer out, try an opt for an iced coffee!
This way you are eliminating the risk of melting or deforming your retainer.
Additionally, you can swap your normal coffee for a cold brew or a darker roast to help bring that pesky acidity level down.
Since braces are definitely considered an expensive orthodontic treatment, it’s important to keep your teeth set in their new positions!
Wearing and taking care of your retainer helps this process along and ultimately, you’ll save money if you take care of your retainer and new teeth from the beginning!
Your Cuisinart Single Serve Coffee Maker Problems Solved!
The iconic Keurig machine completely changed the coffee industry when they invented k-cups and single serve brewers back in 1998.
While intended to be used in offices, I think we can all agree, these single serve coffee machines have taken over college dorms, households and everywhere in between.
While Keurig put their home brewers on the market in 2004, Cuisinart was quick to follow and by 2005, Cuisinart created their own single serve coffee makers.
They now offer six different single serve brewers in total, with some even having the options to grind your own coffee beans, where the grounds go directly into a reusable k-cup.
This particular brewer, the DGB-2 Series, has even been listed as the best single-serve coffee maker with a grinder attached by Good Housekeeping.
This guide mainly applies to many of these single serve coffee makers (such as the Cuisinart SS-15) but does not cover ones such as the DGB-2 series we widely.
Problems are unfortunately unavoidable when it comes to owning a more mechanical product like a coffee machine but doesn’t mean they can’t be easily fixed so you can get back to spending some quality time with a cup of good coffee.
Today, we’ll delve into seven of the most common problems with Cuisinart single-serve coffee makers, along with potential solutions if you come across any of these issues!
Table Of Contents (Click on what section you want to jump to!)
Problem #1: My Cuisinart coffee maker won;t turn on
Problem #2: There are coffee grounds in your cup!
Problem #3: My coffee maker is only brewing a partial cup of coffee
Problem #4: My brewing temperatures are inconsistent
Problem #5: My Cuisinart isn’t dispensing any water or coffee
Problem #6: The water tank is leaking
Problem #7: The brew head is leaking
Problem #8: There is constant scale build up in my machine
When To Seek Professional Help
Summary of Common Cuisinart Single Serve Coffee Maker Problems

7 Common Problems with Cuisinart's Single Serve Coffee Makers
Problem #1: My Cuisinart coffee maker won't turn on / Power Issues
Cause #1: The machine isn’t plugged in
Yes, it sounds silly but we have all been there!
Either we forget to plug the machine in or someone else accidentally unplugged it. This is an easy and quick potential fix to the problem.
Cause #2: The power source isn’t working
The best way to test if the power outlet you are using is bad, is to plug in something you 100% know will work. My go to is my phone charger since I use it every day.
If the outlet is not working correctly, try resetting the correct switch on your circuit breaker to see if that helps.
Cause #3: The power cord or internal circuit board is damaged
The last potential cause for your Cuisinart coffee maker not turning on is that the power cord attached to it, or a separate internal component may be damaged.
To check the cord itself, unplug the machine and look for any wires that might be poking out of the cord. Any cracked areas of the cord could also be signs of damage.
If you don’t see any damage on the outside of the cord, the issue may be internal. At this stage, I would recommend calling the Cuisinart Customer Service line to get the machine serviced.
Problem #2: There are coffee grounds in your cup
If you find your k-cup’s exploding or if there are a lot of coffee grounds making their way into your cup, there are two potential causes for this.
Cause #1: The pod has been incorrectly placed
When you’re placing a K-Cup or coffee pod into the holder, make sure it is fully clicked into place, and that the arrow on the coffee pod holder lines up perfectly with the arrow on the machine itself.
Cause #2: The piercing & exit needles are clogged
The second potential cause for this issue is that the piercing & exit needles (the needles that go into the k-cups) have grounds in them and have gotten clogged.
This can lead to water not being able to correctly flow through the needles and thus a pressure buildup causing the cup to “explode”.
These blocked needles can actually cause quite a few common problems for these single serve coffee makers so we’ve created a section dedicated to cleaning them.
Click here to jump to the section!
Problem #3: My coffee maker is only brewing a partial cup of coffee
Cause #1: The “add water” indicator is on / there is a lack of water in the reservoir
It’s an easy fix for this one! Be sure to double check the water level in the reservoir and fill it accordingly. Cuisinart recommends adding at least 11oz to the container if water is needed.
Cause #2: The piercing needles need to be cleaned
Again, clogged piercing needles can cause many problems. If you’re coffee machine isn’t brewing a full cup, it may be time to give the needles a clean.
Click here to jump to the section with a detailed description and video on how to clean these needles.
Cause #3: The capsule holder & funnel needs to be cleaned
If you have ever used your single serve machine, you are definitely familiar with the brewing chamber or capsule holder area!
This is just the section of your coffee machine where your coffee pod sits.
To clean this section of your single serve coffee maker is really similar to cleaning the needles!
To start, lift the handle on the coffee maker to open. Grab the top of the holder and pull it out of the section.
Once you have the holder out, you can remove the funnel off the bottom fo the holder by twisting it off. Once you do this you will see one of the piecing needles which you can clean using the method above.
Both of these parts, the capsule holder and funnel are top rack dishwasher safe, so feel free to pop those in on a low temperature to clean.
Once taken everything out as well, you can clean the piercing needle that is located in the brewing chamber if you want to be thorough.
Again, feel free to use the method & videos above to help!
Cause #4: The machine needs descaling
Scale in a coffee machine occurs when a variety of minerals found in water (mainly tap) start to build up in the machine and on the components.
It’s important to descale your machine to ensure that it runs correctly.
Cuisinart single serve coffee makers do have sensors that will notify you via the screen when the machine needs to be descaled.
However, they also recommend doing it every 3-6 months or as often as you need even if the “descale” display does not come up.
Click here to jump to our section on how to properly descale your Cuisinart single serve coffee machine.
Problem #4: My brewing temperatures are inconsistent
Inconsistent brewing temperatures are typically caused by issues with the boiler or heating element within the coffee machine.
If scale, or minerals from the water, builds up on this heating element, the boiler may not heat correctly.
This temperature variation is not only annoying but can also affect how your coffee tastes since it isn’t being brewed properly.
Solution:
Like our last problem, the solution here is to give your machine a nice clean via descaling.
Click here to jump to the section on descaling your machine!
Problem #5: My Cuisinart isn't dispensing any water or coffee
Cause #1: The piercing needles are clogged
If your machine isn’t properly dispensing your drink, the piercing needles may be clogged and therefor water cannot get through.
Again, this is a common problem so click here to jump to the section on how to clean these needles properly!
Cause #2: The water reservoir isn’t filled correctly
If your water reservoir doesn’t contain enough water, the machine won’t dispense your coffee!
Double check by filling your reservoir to the max fill line or having at least 11 oz of water in the container.
Cause #3: The machine is acting up
Sometimes you just need to give your machine the ol’ reboot.
Unplug your machine and leave it off for at least thirty seconds or longer. Once enough time has passed, plug it back in, turn it back on and try again.
Problem #6: There is a leak coming from the water tank / reservoir
Cause: The O-Ring needs cleaning or replacing
O-Rings are a type of seal found commonly in equipment or machinery. In the case of your coffee machine, they help prevent leaks and also keeps the pressure regulated.
In your single serve coffee maker, there is most likely one at the connection point of the water reservoir and the machine, as well as in the brew basket.
If the O-Ring is dirty or broken, it doesn’t seal water in correctly, which can cause water leakage from the bottom of the reservoir.
Cuisinart put out a video breaking down the best way to go about it here!
Problem #7: There is a leak coming from the dispenser or brew head
Cause: The piercing needles are blocked
If your machine keeps leaking after you’ve brewed a coffee, the piecing needles may be blocked. with coffee grounds or other things!
Click here to jump to the section on how to clean these needles properly.
Problem #8: There is constant mineral or scale build up in my machine
Cause: Using mineral rich tap water
If you find yourself constantly having the same problems such as scale buildup in your coffee machine, it may be time to look at the type of water you’re using.
Unfiltered tap water is considered “hard water”. It contains a number of minerals and other particles that can cause scale build up in your machine and water hose.
By using filtered or “soft water” to brew your coffee, you can minimize the amount of scale build up. In turn, you may not need your Cuisinart machine as much!
An extra bonus to using filtered water is that it makes a much better cup of coffee, as you don’t have all the extra minerals interfering with that flavor coffee lovers enjoy.
Maintenance Tips & Tricks for a Cuisinart Single-Serve Brewer
Cleaning clogged piercing needles:
While this solution requires slightly more effort, it is still very easy to do.
First start by taking the k-cup holder out from the coffee machine.
Once this is completed you should be able to twist it apart, leaving you with an upper and lower half.
Then, take a paper clip and straighten part of it out. Insert the paper clip into the upper needle and twist to remove and grounds or grime.
Then, repeat this step with the bottom needle.
Once both needles are cleaned, piece back the k-cup holder and reinsert into the machine.
Are you visual learner? Here is a video from Cuisinart themselves showing the process.
Before brewing another cup of coffee, run a cycle or two using a vinegar water mix to ensure the needles and machine are clean completely.
Descaling Solution
Although Descaling may sound complicated, it’s actually easy and only involves you adding a bit of vinegar to the water reservoir system and brewing like normal.
Follow these steps to de-scale your unit:
1. Empty the reservoir
2. Disable the AUTO OFF and OFF TIME features
3. Making sure there is no capsule in the brewing chamber, fill the reservoir with 20 oz. of white vinegar, plus 40 oz. of water
4. Place a large mug on the drip tray. Press and hold the HOT WATER and RINSE buttons to start the de-scale process. Discard contents of mug.
5. Repeat Step 4 until ADD WATER is displayed on the control panel.
6. Rinse the water reservoir thoroughly and fill with fresh water.
7. Run another Hot Water cycle (see page 11). Discard contents of large mug.
8. Repeat hot water process until ADD WATER is displayed on the control panel.
9. You may need to perform additional Hot Water cycles if you detect any residual vinegar taste. Note: If DE-SCALE is still displayed on the control panel after completing the procedure, repeat the de-scaling procedure above. Maintenance: Any oth
Cuisinart states in their own troubleshooting guide that if you have de-scaled your machine twice already and the issue persists, contact customer their service team. 1-800-726-0190
Use filtered water
While it may seem a bit fancy to only use filtered water in your coffee machine, there are real benefits to it!
Firstly, you’ll most likely have to clean your machine less often. Scale buildup is one of the biggest issues when it comes to having a coffee machine. Tap water contains so many minerals that build up on various parts of the machine, causing it to not work as well as we might want.
Filtered water often has substantially less of these minerals, often leading to less scale buildup and overall, a cleaner machine,
Beyond cleanliness, the lack of minerals in filtered water leads tooa clenaer and better tasting cup of cofee being brewed.
Pro Tip: The SS-10 actualyl comes with a charcoal water filter attachment in it. Having this filter helps prevent scale and other gunk from getting into the internal parts and water lines of your favorite machine.
Routine inspection of machine components
The best way to take care of your machine is to do proper maintenance or regular cleaning on it 9or at least semi-regularly!)
This way you can catch a potential problem before it gets bad.
There are simple ways to do this, either by setting a time every month to descale your machine, or just giving the capsule holder a good rinse every now and then.
Cuisinart put out a video on how to properly clean your single-serve brewer to help ensure you can have it for as long as possible!
Brewing with a reusable filter cup (reusable k-cup)
If you have one of the handy refillable pods at home with you, that’s fantastic! The process to brewing a fresh coffee is pretty much the same as if you were using a normal k-cup. All you need to do is pop out that brewing capsule that you would normally place your k-cup in, and replace it with your resuable one.
note: when you’re filling your reusable k-cup with coffee grounds, be sure not to fill it above the max line and leave it loose or untamped.
When to Seek Professional Help
Sometimes you can try everything, and the problem still won’t go away. When this happens, it’s best to leave it to the professionals and call customer support for help.
There are a few instances when Cuisinart actually suggests this, rather than keep trying to solve the issue. One of these instances is if you have descaled the machine properly twice and the descale alert will not go away.
The good thing is, most, if not all, of Cuisinart machines come with a 3-year limited time warranty. This warranty takes place from the date of purchase IF you have proof. If you haven’t kept your receipt since you’ve bought it, it will go from the day the product was manufactured.
If you’re interested in getting your product serviced. you can call the toll-free Cuisinart number at 1-800-726-0190. Note this is only for the US & Canada (and with exceptions for California)
Lastly, all warranty information (and also more cleaning guides!) should be in the manual that came with your coffee brewer. If you’ve thrown yours out (like I do!) they actually have all of them, even the discontinued ones, on the website!
If this add water indicator doesn’t turn off after the water is added, there may be a different issue and it’s recommended to call the customer service line.
Conclusion
Cuisinart machines are fantastic and have found their way into so many homes around the world. Maintenace problems are expected as with most machines, but it doesn’t have to be the end of the world!
We covered a lot of information today for the 7 most common issues when it comes to Cuisinart single serve brewers, but the two main causes for these issues across the board was the piercing needles needing to be cleaned or the machine might need a good descale.
Thankfully both of these are easy to fix and it definitely helps that Cuisinart has put together a number of great videos to help you through the process.
You can find both of these videos below this summary as well as a general cleaning video here.
If you keep having problems with your Cuisinart or these solutions don’t fix your problem, you most likely have a 3-year warranty on your machine.
Cuisinart has a toll-free customer service number for US and Canada customers to help get a service started!
And lastly, remember, the best way to take care of your single-serve brewer is to clean it more often than not!
How Long Is Your Starbucks Iced Coffee Good For?
Ever since the birth of Starbucks in 1971, the coffee company’s popularity has skyrocketed.
In 2023 alone, Starbucks amassed a net revenue of $29.46 billion dollars.
Growing along with the company, Iced coffee popularity has significantly increased over the last few years.
The United States iced coffee market alone is valued at a whopping $47.4 Billion.
From Mochas to Frappuccino’s, some of Starbuck’s most popular drinks have made their way into our favorite supermarkets.
These ready to go cold espresso drinks are fantastic if you’re in a rush, but like everything else, they have a limit on how long they stay good for.
Today we’re going to talk about some of the best cold drinks to try from Starbucks and how long you can hang onto them before they go bad.
Are you in a rush? Here’s a quick summary of the important details to save you some time:
Average shelf life of Starbucks bottled coffees: 9 months
Time to drink after opening less than 3 days (if refrigerated)
Made To Order Drinks: 24 Hours
When in doubt: make sure the drink passes a smell, look & taste test before drinking

How Long Is Starbucks Iced Coffee Good For?
It’s crazy to think that Starbucks has been around for almost 50 years now.
Since the 70’s the company has put out some iconic beverages (hello pink drink) and their cold drink line has proved to be a crowd favorite.
TikTok videos and other social media posts have also played a major part in the growth of iced drinks over the years.
Cold foam, a popular fluffy topping that is added to many iced drinks, has become Starbuck’s number one customization.
If you’ve always been a hot coffee drinker like me, you may not know where to start when it comes to trying one of the hundreds iced coffees out there.
Thankfully two great websites, Parade and Tasting Table, have put together a list of their favorite Starbucks drinks, both bottled and freshly made.
Top 5 Bottled Coffees:
-
Vanilla Sweet Cream Nitro Cold Brew
-
Caramel Frappuccino
-
Espresso and Cream
-
White Chocolate Mocha Frappuccino
-
Mocha Frappuccino
Top 5 Store-Made Iced Coffees:
-
Iced Vanilla Latte
-
Nitro Cold Brew
-
Caramel Frappuccino
-
Vanilla Sweet Cream Nitro Cold Brew
-
Iced White Chocolate Mocha
Common Ingredients In Starbuck's Iced Coffees
Ever since the birth of Starbucks in 1971, the coffee company’s popularity has skyrocketed.
In 2023 alone, Starbucks amassed a net revenue of $29.46 billion dollars.
Growing along with the company, Iced coffee popularity has significantly increased over the last few years.
The United States iced coffee market alone is valued at a whopping $47.4 Billion.
From Mochas to Frappuccino’s, some of Starbuck’s most popular drinks have made their way into our favorite supermarkets.
These ready to go cold espresso drinks are fantastic if you’re in a rush, but like everything else, they have a limit on how long they stay good for.
Today we’re going to talk about some of the best cold drinks to try from Starbucks and how long you can hang onto them before they go bad.
Are you in a rush? Here’s a quick summary of the important details to save you some time:
How Long Is Starbucks Iced Coffee Good For?
It’s crazy to think that Starbucks has been around for almost 50 years now.
Since the 70’s the company has put out some iconic beverages (hello pink drink) and their cold drink line has proved to be a crowd favorite.
TikTok videos and other social media posts have also played a major part in the growth of iced drinks over the years.
Cold foam, a popular fluffy topping that is added to many iced drinks, has become Starbuck’s number one customization.
If you’ve always been a hot coffee drinker like me, you may not know where to start when it comes to trying one of the hundreds iced coffees out there.
Thankfully two great websites, Parade and Tasting Table, have put together a list of their favorite Starbucks drinks, both bottled and freshly made.
Top 5 Bottled Coffees:
-
Vanilla Sweet Cream Nitro Cold Brew
-
Caramel Frappuccino
-
Espresso and Cream
-
White Chocolate Mocha Frappuccino
-
Mocha Frappuccino
Top 5 Store-Made Iced Coffees:
-
Iced Vanilla Latte
-
Nitro Cold Brew
-
Caramel Frappuccino
-
Vanilla Sweet Cream Nitro Cold Brew
-
Iced White Chocolate Mocha
Common Ingredients In Starbuck's Iced Coffees

When it comes to buying an iced coffee at Starbucks, the ingredient list is pretty straight forward!
If you’re ordering an iced latte or similar drink, you will have a coffee or espresso base (made of coffee and water), milk, and any classic syrup used in the drink.
If you’re ordering a more traditional iced coffee like an iced americano, your drink will just consist of the espresso or coffee base and ice!
Surprisingly, the bottled drink ingredients were very similar to a freshly made iced coffee.
While I struggled a lot to find an ingredient list for these bottled drinks, I finally came across a mocha Frappuccino on the Walmart online store.
The ingredients for the Mocha Frapp as are follows:
-
Brewed Starbucks coffee (coffee & water)
-
Reduced fat milk
-
Sugar
-
Cocoa
-
Pectin (helps flavor release, mouthfeel & viscosity)
-
Ascorbic Acid (vitamin C, used as an antioxidant)
This short ingredient list is great for a few reasons. Firstly, the drink is not absolutely loaded with preservatives.
Second, we can see that it’s actually made with real milk, not milk powder, which gives the drink a better taste in my opinion.
Nutrition Tip! Some of these bottled coffees have a higher sugar count than you might expect. A bottled Mocha Frapp contains more sugar than a can of coke! (around 43 grams of sugar)
Bottled Coffee Shelf Life: The Main Factors That Affects The Shelf Life of Starbucks Coffee

There are a few main factors that will affect the shelf life of pretty much anything, including bottled coffees.
Factor #1: Oxygen exposure
If you’ve ever left a food out unwrapped and it goes stale, you know how oxygen can affect the things we eat and drink.
The color, flavor, nutritional value and overall quality of the item can decline when exposed to oxygen.
This is why antioxidant ingredients (like ascorbic acid) are added to foods and drinks to help extend their lifetime.
Factor #2: Processing Techniques
How the item is processed plays probably the biggest role in the shelf life as the processing technique is what kills all the harmful bacteria and microbes that may be in the food or drink.
One of the more popular forms of processing that you’ve probably heard of is pasteurization, which so many things we love undergo.
Milk, eggs, juice and alcohol are all drinks that may undergo the pasteurization process.
For those not familiar with the processing technique, pasteurization is a process when the item is heated at extremely high temperatures for a very short period of time.
This intense but short period of heat kills of bad bacteria while keeping the quality of the product the same.
There are two different types of pasteurization that apply to coffee: high heat and ultra-high heat (UHT)
Ultra-high heat (UHT) processing is when “the product is heated between 280° to 300° F for only 2 – 6 seconds to sterilize the liquid.”
Depending on what type of brewing process was used (brewing with hot vs. cold water), it will need to undergo one or the other.
Coffee that goes through a hot brew process (a.k.a hot water is used) has a low PH and therefor has to go through higher heat or ultra-high heat pasteurization.
Cold brew coffee has a different PH, so while it still needs to go through pasteurization, it doesn’t have to be at super high temperatures.
After this process is completed, you are left with a delicious coffee drink that doesn’t have to be refrigerated until opening and has a much longer shelf life.
Factor #3: Packaging
Packaging is important for one main reason, sun & UV exposure.
Sunlight and UV rays can increase how fast an item degrades, hence why many companies recommend their product is stored in a cool or dry place.
If you purchase an item that comes in clear cups or see-through packaging, it may degrade quicker than one in a darker or opaque packaging.
How Long Will My Starbucks Iced Coffee Last Before Going Bad?

Bottled & Canned Starbucks Coffee:
Now to the important information! As we just discussed, drinks that undergo UHT & pasteurization don’t need to be refrigerated and tend to last a long time.
Certain products, like long life milk. can have an almost indefinite shelf life.
The majority of Starbucks bottled drinks that undergo pasteurization allow them a shelf life of around 9 months in unopened.
If you have your doubts on if the drink is still good, check the printed expiration date on the bottle!
If the drink is past expired, it may be unsafe to drink, and potentially has lost some of its delicious flavor.
Note: This lifespan of around 9 months is drastically cut down once you open the drink.
You immediately introduce bacterial growth as well as oxygen to the drink. Once opened, you have around 3 days to enjoy your drink (if you keep it refrigerated)
Fresh or Made to Order Drinks:
Like any other product that made to order, the lifespan isn’t that long.
Unlike bottled coffees, the drink is immediately exposed to oxygen and heat. This instantly allows more bacteria to start forming in your coffee.
Your best bet for keeping the drink safe from unhealthy amounts of bacteria, is to refrigerate it until you’re ready to enjoy it again.
Overall, the lifetime of these drinks is much more play it by ear.
Depending on the weather and how long you’ve had it at room temperature for, the lifespan of your coffee can change. I personally wouldn’t leave it in the fridge longer than a day.
With fresh drinks, there are a few things to consider as the flavor might change the longer you keep it.
1. Melting Ice
Unfortunately, the ice in your drink is bound to melt eventually.
When this happens, your coffee will become watered down and potentially lose that delicious, iced coffee flavor we all love.
An easy fix for this is making coffee ice cubes at home or holding off on the extra ice.
You can swap out the normal ice for these and instead of being left with a watery coffee, you’ll get an extra coffee burst when they melt.
2. Fridge Storage
Another factor to consider is what you have in your fridge.
If you decide to store your drink in the fridge overnight, it may absorb some of the flavors from other foods nearby.
This may not have a huge impact on the flavor, but trust me, you don’t want to have even a slightly onion flavored coffee.
A great way to avoid any unfortunate flavor transfers is to put the drink into an airtight container for storage. That way you keep can keep the coffee flavors in and onion flavors out!
3. The Brewing Process
When a coffee is made using hot water, or made using an espresso base, you’ll want to enjoy it sooner than later as the flavor may change the more it cools.
When a coffee is cold brewed or made with cold water over a long period of time (12-24 hours) it creates a smoother flavor that is less likely to change over time.
How To Tell If Your Coffee (or drink!) Has Gone Bad

Please don’t make the mistake of drinking an expired coffee… it’s not pleasant and can be dangerous!
Three things to look for if you worried your drink may have gone bad:
-
The Color and/or Look
Your drink should never change color unless you add something to it!
Especially with drinks containing milk, it may have gone off if the texture, consistency, or color has changed.
A drink color will typically change if bacteria or mold has been growing, which can lead to food poisoning and other unpleasant symptoms.
This is easy to see if the drink is a lighter color, but with a black or dark colored coffee, a color change into a darker black color may be a warning sign.
Lastly, if a coffee, iced or hot, has been sitting for a while, the coffee oils may rise to the surface.
If you’ve ever seen an almost translucent rainbow color on top of your drink before, this is coffee oils!
-
The Smell
When bacteria and other nasties are growing, the smell of a drink can change.
A sour smell is almost always an indication that the item is no longer good to drink.
-
The Taste
If the drink passes the color and smell test, you might want to give it a small taste if you’re still skeptical.
While the taste may change when the ice melts in your drink, it shouldn’t taste sour or too different.
Alternative Uses for Stale or Gone-off Iced Coffee

If you’re hesitant to toss your drink out entirely, there are a few things you can reuse it for!
1. Water your plants
Coffee contains so many nutrients, like Nitrogen, that can be great for plant growth,
Coffee is a pretty acidic drink, and while there are some acid-loving plants out there like Hydrangeas, not all plants will love the highly acidic drink.
It is recommended to dilute the old coffee with a bit of water to ensure you don’t harm your beautiful plants!
2. Add it to your compost!
Again, coffee contains a lot of great nutrients and can help speed up the decomposition process! Adding your leftover coffee to your compost pile is a perfect way to give back to the environment.
Summary: How Long is My Starbucks Iced Coffee Good For?

There are so many factors that can influence how long a drink is good for.
Thankfully, Starbucks has kept it simple with only a few ingredients going into both their store made and bottled cold coffees:
Thanks to using high temperature and ultra-high temperature (UHT) pasteurization, the bottled coffees are expected to have a shelf life of around 9 months.
Keep in mind, once you decide to open the bottled, the life span drops to around 3 days if you refrigerate it correctly.
Freshly made drinks have a much shorter lifespan, around 24 hours, which is expected as they’re exposed to the elements straight away!
The biggest concerns with freshly made drinks is how the flavor may change if you decide to refrigerate them.
Beyond the ice melting, your drink may absorb some of the other flavors in the fridge if it’s not stored in an airtight container.
You may be left with a nasty onion-y taste in your coffee if they’re close to each other!
Lastly, if you’ve left your drink in the fridge a bit longer than you wanted, there are three things to look for to see if it’s gone bad are:
1. Any color or Texture Changes
When bacteria and mold grow, it can cause color and texture changes in the drink itself.
If the drink becomes curdled or turned a darker or strange color, it’s probably time to toss it
2. Smell
If the drink in question smells different than normal, such as sour or just “off” its probably a sign that it has spoiled.
Drinks that have been exposed to air naturally lose some of their good smell over time, but a total change in smell is definitely a sign of it going bad.
3. Taste
when in doubt, you can always give it a tiny taste. Use your best judgement here and if you have doubts throw it away!
If you dont want to waste your drink, adding the stale coffee to your composter is a great way to reuse the leftover iced coffee! 🙂
Thai Vs. Vietnamese Coffee: History, Beans, and More
Thai and Vietnamese coffee culture is one that is filled to the brim with history. These delicious coffees have slowly made their way across the world and have left people wanting more.
With the coffee industry in South East Asia being valued at a whopping $8.2 USD in 2023, it is only expected to grow with some Vietnamese coffee roaster even making their way into the specialty coffee industry.
While there are definitely some differences between the two countries coffee stories, there are also many similarities.
We cover a fair amount of content today, so if you’re in a pinch for some information, here is a quick summary of the differences and similarities between Thai and Vietnamese coffee.
Feel free to click on the main topic and jump to that section of the article for more information!
History: Thai coffee production started around the 1960’s while Vietnam’s started around 1890
Beans: Both mainly grow and use robusta beans
Brewing: Vietnam uses a Phin filter while Thailand uses a sock filter
Milk: Sweetened condensed milk is commonly used in both countries’ coffees
Roasting methods: Dark roasted coffee is most common in both countries
Other topics discussed: Flavor Profiles, Where To Buy, Brew At Home, Overall Summary
Thai Vs. Vietnamese Coffee: History, Beans, and More

Origin & History Of Thai Coffee

Coffee culture in Thailand started way later than you may think, only truly beginning in the 1960’s.
The king, Bhumibol Adulyadej, wanted to move the country towards a more beneficial (and legal) way to make money. At the time, their main source of income was through opium crops.
This movement was named The Royal Projects and got Thailand started on their iconic Robusta coffee production.
While the industry may not have started until the 60’s, coffee started being enjoyed in Thailand after being introduced by Dutch traders in the 19th century.
Unfortunately, the coffee beans were primarily grown in Indonesia and were pretty poor quality at the time.
Because of this people commonly added sugar or butter to help mask the bitter taste of the drink.
This sugary coffee drink was named, O’yua, (hot black coffee) and essentially is the precursor to the now popular, O’liang, (iced black coffee).
Commonly Ordered Thai Coffee Drinks
There are 5 main types of coffee drinks that you can find in Thailand.
The names are self-explanatory when translated as the world in the Thai correlates to how the coffee is made.
For instance, Gafae = coffee and Yen = iced, therefore Gafae Yen is iced coffee.
- Gafae Yen: Thai iced coffee with sweetened condensed milk
-
Gafae Ron: Thai hot coffee w/ condensed milk
-
O’liang: Black & iced coffee
-
O’yua: Black & hot coffee
-
O’liang Yok Law: O’liang coffee with evaporated milk added
Origin & History Of Vietnamese Coffee

Unlike Thailand, Vietnam’s coffee culture started substantially earlier.
Vietnam was a part of French Indochina up until 1954 and therefore the beginning of their coffee journey was strongly influenced by the French.
An Arabica coffee plant was first introduced to the country by a French catholic priest in the 1850’s. By the late 1800’s and early 1900’s the coffee industry had started the grow.
This is almost 60 years before Thailand even started growing their coffee plants!
The coffee production continued to grow until a large production plant was created in 1950 to start properly producing and exporting Vietnamese coffee.
By 1999, Vietnam became the second biggest supplier of coffee in the world, and today they produce around 40% of the worlds Robusta coffee beans.
Commonly Ordered Coffee in Vietnam
Listed below are four commonly ordered types of coffee in Vietnam.
Already you can see one of the differences between Thai and Vietnamese coffee, the type of milk used.
While Thai coffee primarily uses condensed milk or evaporated milk, topping your coffee with a creamy egg mixture or coconut milk is not uncommon in Vietnam.
-
Ca phe nau: Vietnamese iced coffee
-
Ca phe sua: Vietnamese hot coffee
-
Ca phe truang: Egg coffee
-
Sua cha ca phe: Yogurt coffee
-
Ca phe cot dua: Coconut Coffee
Coffee Beans Used in Vietnamese and Thai Coffee

Both Vietnam and Thailand largely produce and export the same type of coffee bean, Robusta.
if you are not familiar with the difference between Robusta and Arabica coffee beans, here’s a quick recap:
There are two types of coffee beans that are used in the industry, Arabica and Robusta.
If you normally drink coffee, you are most likely drinking a roast made from Arabica beans as it accounts for between 60-70% of the coffee we drink.
To put it simply, Arabica beans tend to be the preferred choice as they create a sweeter and less bitter flavor than Robusta beans.
However, robusta beans are still grown around the world and are commonly the beans used in instant coffee.
Now, although Robusta beans account for less than half of the world’s coffee supply, there are some major benefits to growing this bean over Arabica.
Enviornmental Influences
Robusta coffee trees tend to thrive in lower altitudes, between 0 and 800m above sea level. Ideally, the trees will also be grown in a tropical climates with distinct wet and dry seasons.
If we look at Vietnam, the central highlands were the first location for coffee to be grown in the country.
This area has the perfect environment for robusta beans to thrive as opposed to Arabica trees, which prefer a much higher elevation.
You can find Arabica bean production in Vietnam today, but it will be located in the more mountainous areas.
If you look at the maps of both countries below, you can see a distinct difference in where Robusta beans (red pin) and Arabica beans (blue pin) are grown.
Some of the main regions in each country where coffee is grown is as follows:
Robusta
Vietnam: Dak Lak, Gia Lai, Dak Nong, Lam Dong, Kon Tum
Thailand: Ranong, Chumphon, Surat Thani, Phang Nga, Nakhon Si Thammarat
Arabica
Vietnam: Da Lat, Dien Bien, Nghe An, Son La, Quang Tri
Thailand: Mae Hong Son, Chaing Mai, Chaing Rai, Lampang, Tak
Durability of the Plant
Farmers tend to find that growing Robusta trees is much easier than growing Arabica trees.
This is due to the genetic makeup of the tree itself. Robusta trees are more resilient to disease, insects and tend to produce more fruit than Arabica trees.
All in all, growing robusta trees tend to be less work for those growing them.
Both countries started to produce Arabica beans in the late 90’s and early 2000’s but on a much smaller scale.
Today, Vietnam’s coffee production comes to about 90% Robusta beans and 10% Arabica beans.
How Are Vietnamese and Thai Coffee Beans Roasted?

Both Vietnamese and Thailand traditionally create dark roast coffee beans. This means the beans spend a longer time in the roaster.
This roast time can range from 15 minutes to even an hour.
Traditionally, Vietnamese coffee is roasted using a drum style method over an open fire. The beans are roasted in an oil-y combination of sugar, cocoa and vanilla to give the beans the unique flavor they are known for.
In Thailand, a traditional roasting technique is to first roast the beans as normal. This could be using a drum style method like Vietnam, or another method.
The roasted beans will then be roasted again after adding other ingredients such as brown rice, soy beans, or cardamom.
Similar to Vietnamese coffee, sugar will be added at the end to add a coat of caramelization to the beans. Brown sugar is typically used for this step of the process.
Vietnamese & Thai Coffee: The Different Brewing Processes
We’ve talked about how Thai and Vietnamese coffee is known for their strong and robust flavor profiles.
This is in part because of the dark roast robusta beans used but also the brewing method.
Traditionally, both types of coffee are brewed using a slow drip method that takes around 5 minutes to make a cup of coffee.
Because of how long the water takes to go through the coffee grounds with this method, the flavors of the beans are intensified even further.
The main difference in the brewing methods between the countries comes down to the type of filter used.
The Phin Filter
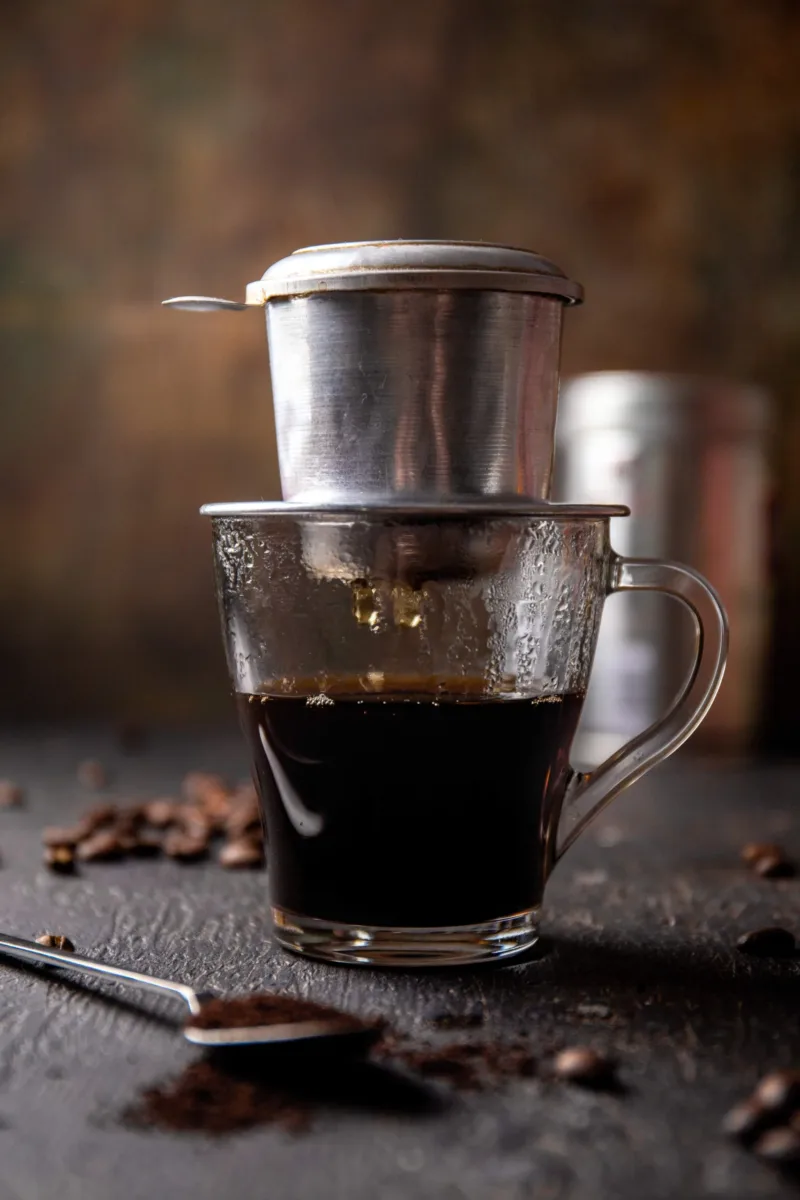
This Vietnamese filter consists of 4 different parts:
-
A brew chamber
-
A filter plate
-
A lid to trap heat
-
A gravity press filter
You first place the metal filter plate on top of whatever glass you would like to use, followed by the brew chamber.
You then add the amount of the ground coffee beans you would like to use, followed by the gravity press filter.
After this, top it up with hot water and leave the lid on for it to brew. This method of brewing is slow, and around 5-6 minutes in total.
Again, this slow dripping method creates a more intense and flavorful tasting cup of coffee that will wake you up immediately!
If you would like to try this method at home, this is a recommended Phin filter to use.
The Sock Filter
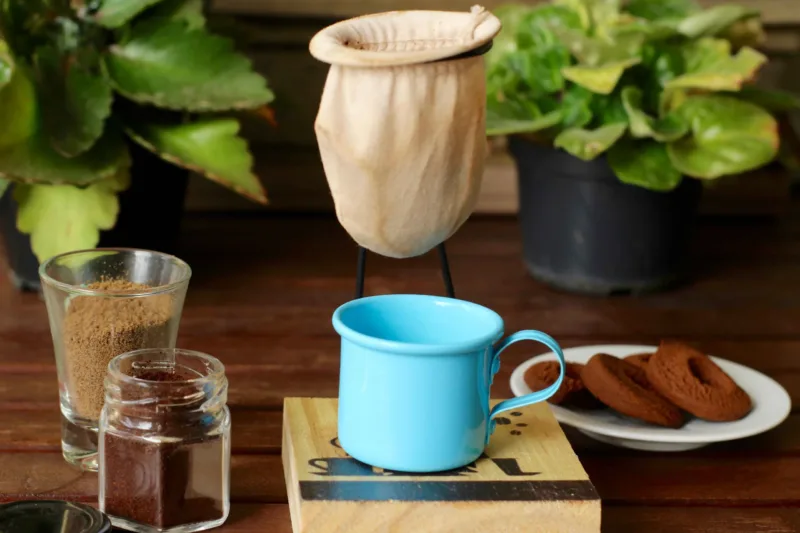
The traditional Thai brewing method consists of a sock filter. Which, you guessed it, is a filter that looks like a sock.
The sock filter is attached to a ring and a metal handle. To use it, you place the coffee grounds within the sock filter and placed the filter on top of your favorite cup.
Similar to the Vietnamese method, you will pour the water into the filter and let the coffee slowly drip the cup.
This method is again, considered a slow brew method, giving a lovely strong flavor to the cup of coffee.
If you would like to try this method at home, this is a recommended sock filter to use.
Milk Used In Vietnamese & Thai Coffee

As we discussed earlier, both Thai and Vietnamese coffee offer very strong and bold flavors, especially when slow brewed.
Because of this strong and often bitter taste the coffee has, sweeteners and milk are often added to elevate the flavors and reduce the bitterness.
There are few different types of milk that are used in both countries:
-
Sweetened condensed milk
Sweetened condensed milk was introduced to Vietnam by the French back in the late 1800’s.
Remember when we talked about the influence the French had in Vietnam’s coffee culture? The addition of sweetened condensed milk was a major part of it.
While they were initially looking for normal milk to use, dairy was not common in the country and therefore had to be imported from Europe.
Since the normal milk would spoil on the trip, they chose sweetened condensed milk instead as it would survive the long journey overseas.
Sweetened condensed milk is also used in Thai coffee.
Back before O’liang was a common drink, the locals added butter and sugar to their O’yua coffee to hide the bitter and burnt taste.
-
Coconut Milk
A popular addition in Vietnamese coffee is coconut milk. It can be used on its own to make sure the coffee is dairy free or add it to the condensed milk to add another layer of flavors.
- Evaporated Milk
You may find evaporated milk in some Thai coffees such as Gafae Ron and O’liang Yok law.
This thicker version of milk adds an additional nutty flavor and creaminess to the coffee.
The Unique Flavor profiles of Vietnamese & Thai Coffee

Both Thai and Vietnamese coffee have unique flavor profiles that keep people coming back for more.
Many intense flavors come from the roasting methods.
Take Vietnamese coffee for example, when it is roasted in sugar, cocoa, and vanilla, some of these flavors appear in the final brewed product.
When Thai coffee, is made, the Robusta beans are mixed with a number of other ingredients such as corn, soybeans, and sesame seeds. This adds another layer of flavors to the bean itself, so the coffee is sure to pack a flavor punch.
Another factor that influences the flavor profile is the type of coffee bean used
As we talked about before, Robusta beans are the most common to find in both of these countries.
Robusta beans tend to provide a more nutty, chocolatey, and bitter coffee flavor.
If you opt towards Arabica beans instead, you might have a sweeter, smoother and more acidic coffee.
Lastly, both traditional coffees are considered relatively sweet due to the addition of sweetened condensed milk.
Thai style coffee also has sugar added in pretty much every drink, even if you order an “O’yua” which is considered a black hot coffee.
The use of Robusta beans helps balance out some of the sweetness with the bold flavor the beans provide but if you don’t like your coffee as sweet, feel free to add less sweetened condensed milk or take it out all together!
The Caffeine Content In Thai & Vietnamese Coffee
Both Thai coffee and Vietnamese coffee are made using Robusta beans and are brewed using a slow drip method.
Because of these two factors,, the caffeine content tends to be slightly higher than a cup of coffee that uses arabica beans.
There will be around 100-120 mg of caffeine in a standard cup of Thai or Vietnamese coffee, this is compared to the around 95mg of caffeine you will find in a normal 8oz cup of coffee.
Where To Buy Vietnamese and Thai Coffee Beans
Are you convinced you want to give Vietnamese or Thai coffee a try?
As both Vietnamese and Thai coffee have become extremely popular in the last few decades, you can find both types of coffees quite easily.
If you want to try making your own Vietnamese coffee at home, these companies are a great place to start!
Just click the heading to be re-directed to the company site.
Nguygen Coffee Supply
Nyguen coffee is a specialty coffee roaster that sources their beans from the central highlands of Vietnam.
They offer a few different types of coffee beans that allow you to choose what you want based off the flavor profile you’re looking for!
Some of their popular blends are:
- Moxy Blend: A 100% Arabica blend with a fruity and sweet flavor profile
- Loyalty Blend: A nutty and smooth flavor profile
- Truegrit Blend: A blend of 100% Robusta beans and double the caffeine as the Moxy blend!
O’liang Powder Mix
Even if you’re not planning on making O’liang at home, this is a Robusta bean powder that is widely recommended for making Thai coffee.
You’ll find some of the extra ingredients we talked about earlier (corn and soybeans) mixed into this blend.
Making Vietnamese & Thai coffee at home

Now, I personally have not made Vietnamese or Thai coffee at home, yet!
So, instead of giving you step by step instructions on how to make the most authentic cup, I will leave you with two videos I think would be fantastic guides to making one of these coffees at home!
Pailin does a fantastic job of taking you through 4 delicous Thai coffee recipes in this video. I also recommend checking out her channel if you love Thai food!
This video on Vietnamese coffee is created by the owner of Nyugen Coffee Supply, Sahra, so I promise you are in good hands!
Summary: The Differences & Similarities Between Thai and Vietnamese Coffee
The coffee industry has influenced Thailand and Vietnam so much over the last few decades.
Both countries have grown to become major suppliers of coffee with Vietnam producing 40% of the robusta beans in the world.
Due to the climate in both countries, Robusta is the main bean that has been produced in both countries.
While Arabica beans are now produced in both, the Robusta bean has led to the bold and bitter flavors both coffees are known for.
The first difference you might find between the two coffees, happens when the beans are roasted.
Although both countries commonly produce dark roasted beans, both countries add different ingredients, such as vanilla, sesame seeds, or cardamon to elevate the flavor.
Finally, while you will find both countries use condensed milk in their coffees and have sweeter coffee drinks, they are brewed using different filters.
While Vietnam uses a Phin filter, you’ll find in Thailand they use a sock filter. But even though they are different filters, they are both slow drip methods, creating that strong cup of coffee we all love!
Overall, both countries produce a coffee that is absolutely delicious and loved around the world. If you have a chance to try one of the two, I highly recommend it!
FAQ
What is egg coffee?
Egg coffee is a popular type of Vietnamese coffee that combines delicious robusta beans, brewed with the traditional Vietnamese coffee filter, the Phin filter, with a cream made from egg yolks and sweetened condensed milk.
Nguyen Coffee has put out a fantastic video on how to make the perfect egg coffee at home. You can watch it here!
Does Drinking Vietnamese Or Thai Coffee Break A Fast?
Typically, fasting involves not eating any food or drinking anything that contains calories for a certain period of time.
Although consuming black coffee does not break a fast, drinking coffee with milk, or in this case, sweetened condensed milk, would break a fast due to the number of calories in the condensed milk.
Do You Need A Phin Filter To Make Vietnamese Coffee?
The slow drip nature of the Phin filter creates the strong intense flavor Vietnamese coffee is known for.
If you don’t have a Phin filter but still want to make a more traditional tasting Vietnamese coffee, there are some alternatives.
You can use a French press with a high coffee to water ratio to try and bring through that strong flavor that Vietnamese coffee is known for.
You can also try using espresso as a base for the coffee, as it also has a very strong flavor.
In order to try and get that authentic Vietnamese coffee flavor, try using 100% robusta beans from Vietnam!
As always, thank you for reading today’s article! Have you tried Vietnamese or Thai Coffee before? Drop a comment to share your experience!
You may also enjoy these other articles on the Procaffinator website.
- Get a Great Deal on Travel Coffee Mugs With Your Student Discount
- 3 Reasons Why You Shouldn’t Pass On McDonalds Coffee
- Coffee For a Cause: Give Back with Each Cup of Coffee
Do you love cafes? Follow the Procaffinator Instagram to see cafes all around the world!
Have a great rest of your day and keep on procaffinating! 🙂
Can You Bring Coffee On A Plane? (US, CAN & AUS)
Picture this.
You go on a fantastic vacation and find the best coffee you’ve ever had.
You decide to buy some to take back home with you and the next thing you know…. it’s getting thrown out by airport security.
How deflating would that be??
To avoid this hypothetical situation from ever happening, today we are covering everything you need to know about bringing coffee and other coffee products on a plane!
Note: This guide touches primarily on the customs rules in the USA, Canada, and Australia.
To be 100% sure what products back into your own country, I recommend giving the airline you’re flying with a call.
This post may contain affiliate links. If you decide to purchase an item through a link on this page, I may get a small commission from the product, at no extra cost to you!
Can You Bring Coffee On A Plane?

With how strict TSA (transportation security administration) and customs can be, it is quite surprising to learn just how much you can bring with you on a plane.
We will be covering a variety of different coffee items, even coffee machines, and more!
Keep in mind, the final decision on if you can bring an item onto the plane lies with the TSA officer.
Roasted Coffee Beans - declare these!

USA
Yes, you are allowed to bring roasted coffee beans both in checked baggage and in your carry-on baggage when traveling into the USA.
As of now, there are no limits to the amount of roasted coffee beans you can bring in
Yes, you can bring roasted coffee beans into Canada without issue.
Unlike the United States, there is a limit to the amount you may bring in.
The maximum amount of roasted coffee you can bring into Canada is 20kg per person.
Australia
Similar to Canada there are limits are the amount of roast coffee you can bring in Australia.
You are allowed to bring in 10 kg of roasted coffee per person through customs into Australia.
Note: the rules are different if you plan on bringing in Civet coffee into Australia and will be discussed further in a section below.
Ground Coffee - declare these!

USA
Similar to the roasted beans, there is no limit to the amount of ground coffee you can bring into the USA. This applies to both your hand luggage and checked luggage.
Canada
Yes, you are allowed to bring ground coffee, up to 20 kg per person, into Canada without having any issues.
Australia
Ground coffee is allowed into Australia in quantities up to 10 kg per person.
Similar to roasted beans, if you plan on bringing in ground civet coffee, specific rules apply which are discussed below.
Note: If you do decide to bring more than 12 oz of ground coffee with you in your carry-on bags, the grounds may go through additional screening per TSA rules.
This extra screening is due to the coffee being considered a powdered substance.
Green (unroasted) Coffee Beans - absolutely need to declare

Green coffee beans are technically unprocessed and therefore may contain agricultural hazards such as quarantine pests.
Due to the potential risk to native plants, these rules are a bit more restrictive.
Fact: A quarantine pest is a pest that is regulated at the federal, provincial or municipal level, to prevent its introduction or additional spread.
USA
Again, green coffee beans are allowed in both your carry on and checked luggage when entering the USA. However, there are a few more restrictions in place as the beans are unprocessed and may contain “quarantine pests”.
If you plan on traveling to or through Hawaii or Puerto Rico, you are NOT allowed to bring green coffee beans with you, in your checked or carry-on luggage.
Lastly, the beans are likely to be tested for quarantine pests and potentially could be “seized or destroyed” if any are found on the beans.
Canada
Although there was no mention of green coffee beans on the Inspection Canada website, multiple other articles state that similar to other countries, the beans will go through additional screening.
If quarantine pests are found during the screening, the product will be destroyed or exported.
You are allowed to bring green coffee beans into Australia in quantities up to 5kg or less according to a statement put out by the Internation coffee Expo.
The beans must also have be accompanied by a phytosanitary certificate.
If the beans are inspected and found to not meet the import conditions they will be exported or destroyed.
Whole Coffee Berries (aka, coffee cherries)- Absolutely need to declare

USA
Similar to green coffee beans, whole coffee berries are considered unprocessed.
Unfortunately, you are not allowed to bring these coffee cherries into any U.S. port of entry as the coffee cherries contain a pulp that “presents an exotic fruit-fly risk”
Canada
There was no mention of coffee cherries on the Canadian customs website.
If you plan on bringing coffee cherries back to Canada, talk to your chosen airline before your arrival.
Australia
There was no mention of coffee cherries on the Australian customs website.
If you plan on bringing coffee cherries back to Australia, talk to your chosen airline before your arrival.
Bringing Civet & Lupi Kuwak Coffee Into Australia

For those who haven’t heard of Civet or Lupi Kuwak coffee before, this is a type of coffee that is made by using coffee cherries that have been digested by an asian palm civet cat.
Essentially, the animal is fed the coffee cherries which then are processed in the digestive tract and later pooped out.
The digested beans are then washed, roasted and turned into this famously expensive coffee.
If you plan on bringing back this Civet coffee from any of your travels into Australia, the following limitations apply:
- the beans, or the beans from which the product is made, have been roasted
- the product is commercially prepared and packaged
- the product is imported in an amount up to 1 kilogram
- the product is for the personal consumption of the person wishing to import it
Similar to unprocessed coffee beans, the Civet coffee will be inspected upon arrival into Australia.
If there are any issues with the product causing it not to meet import conditions, it will be destroyed or exported.
Coffee Pods, Instant Coffee, K cups and More

Coffee pods, k-cups, coffee powder or anything similar are widely considered solids or powders by the airline industry since they contain ground coffee.
Due of this, there are not any limitations on bringing them into the USA, Canada, or Australia.
If you plan on bringing the pods in your carry on, they will be treated as powders and will only be inspected if you have more that 350 grams or 12oz of product with you.
Again, to be sure, feel free to call the airline you’re flying with to double check.
Declaring Coffee: General Rules
Coffee is a product that you absolutely need to declare with customs, especially if bringing in unprocessed products like the green coffee beans and coffee cherries.
Since some of the products can pose agricultural threats to the country you’re bringing them into, customs officers or TSA agents need to thoroughly check the product before you enter.
If you fail to declare a product and are caught, you can potentially be fined up to $1,000 in the USA for a first-time offense.
If you’re unsure if you should be declaring a product, it is best to declare it just in case, or talk to one of the customs workers.
General Airline Guidelines for Coffee Lovers

Here are some basic rules to keep in mind when traveling with coffee or your favorite coffee products to keep them from being taken by a TSA officer.
TSA’s 3-1-1 rule
I’m sure this one comes at not surprise for anyone who has traveled before!
Liquids are not permitted in a carry on unless they are at or under 3.4oz or 100ml.
There are certain exceptions to this rule (for instance I bring my contact solution with me) but liquid coffee and general drinks are not one of them.
Additionally, the container the liquid is in has to be the regulated size as well.
This means you can’t bring 3oz of your favorite coffee drink in a 12 oz coffee mug.
Rules for powdered substances
If you plan on bringing K-cups, ground coffee, or any other powdered substance with you onboard, try to keep the amount under 350 grams or 12oz.
If you bring more than this amount, the item may be additionally screened.
Organization is key!
Due to not knowing if TSA will need a closer look at what you’ve packed, it is best to keep your bag organized and have the items that may be inspected in an easily accessible area.
Can You Bring Starbucks on a Plane?
This question is dependent on when you actually buy your cup of coffee.
Due to the TSA 3-1-1 rule, if you purchase your coffee before going through security, you will likely have to throw it out.
However, if you visit the Starbucks in your terminal before boarding the plane, you should be all set to bring it on with you.
This may change if you’re catching international flights.
For instance, I was not allowed to bring a bottle of water I bought in the terminal on my flight to Australia, but any rules should be made clear by gate agents before boarding.
Bonus: Looking for a great travel mug as a student? Check out our list of stores you can shop at to get the best discount!
Can You Bring Iced Coffee on a plane with your carry-on luggage?
Similar to bringing Starbucks or other liquids on a plane, unless your iced coffee is under 3 fluid oz, you will have to through it out when you go through security.
The alternative is purchasing an iced coffee from one of the coffee shops inside the airport or at one of the other service stations.
Can You Bring a Coffee Grinder or Coffee Making Equipment on a Plane?
Surprisingly, you actually can bring the majority of your coffee equipment with you on a plane!
The few exceptions to this mainly apply to coffee grinders due to the blades inside of them.
If you plan on bringing a coffee grinder with you on board, make sure it has removable blades. Otherwise place it in your checked bag for safe keeping in the meantime.
Note: Many airlines will have a weight restriction on carryon bags before adding additional charges! Below is a breakdown of the general size and weight limit for hand luggage.
How to Pack Coffee for Air Travel

One of the best parts about bringing coffee home from different areas of the world are the different flavor profiles and aromas the beans will have.
With experts stating “coffee beans are best used between two to 14 days after roasting” there isn’t too much time to travel with your new coffee finds.
In order to keep the coffee beans as fresh as possible, there are a few things to consider:
- exposure to air
- exposure to sunlight
- exposure to moisture
These are all factors that contribute to coffee beans going stale quickly.
To avoid these issues and keep your coffee fresher for longer, it is recommended to use an airtight and opaque container if possible.
To get an idea of what you should look for, some great coffee storage containers on the market currently are as follows:
Coffee Gator Stainless Steel Canister
Fellow Atmos Vacuum Coffee Canister
Of you don’t feel like purchasing anything fancy, don’t worry!
The bags many coffee roasters store their beans contain vents and other features that are meant to keep them fresh and flavorful for a while.
Many travelers put the bag into another resealable bag to stay on the safe side of things as well. Feel free to keep the bag in your carry-on or checked luggage.
Tip: It is recommended to buy whole coffee beans if possible. Ground beans are likely to lose their flavor quicker than the whole beans.
Summary: Can you bring coffee on a plane?
All-in-all, YES, you should be able to bring your favorite coffee on the plane with you or in your checked bag.
There may be quantity limits based on which country you will be entering, so it is best to check the relative customs site to avoid any disappointing situations with TSA or any customs officers.
It is especially important to follow guidelines when bringing in unprocessed coffee beans such as green coffee, coffee fruit or coffee cherries.
These items have the most restrictions in place as they can bring in quarantine pests that can cause damage to crops and other agriculture.
Additionally, coffee is considered one of the agricultural products you need to be declaring upon arrival in most countries.
If you are unsure if you should be declaring anything, it is best to declare it anyways to avoid any fines or other issues with security or customs.
Have you brought back coffee from your travels? Let us know in the comments!
You may also enjoy these other articles on the Procaffinator website.
- Get a Great Deal on Travel Coffee Mugs With Your Student Discount
- 3 Reasons Why You Shouldn’t Pass On McDonalds Coffee
- Coffee For a Cause: Give Back with Each Cup of Coffee
Do you love cafes? Follow the Procaffinator Instagram to see cafes all around the world!
As always, thank you for reading, have a great rest of your day and keep on procaffinating!
Can You (and should you) Put Hot Coffee in a Red Solo Cup?
Red Solo Cup: the iconic plastic cup that has swept the nation over the years and has inspired one of Toby Keith’s most well known songs.
The burning question we will be answering today is for all of the college students, campers, or anyone else out there who is in a pinch for a coffee cup.
Can you put hot coffee (or any hot liquid) into a red solo cup??
The simple answer to this question is yes, of course you can pour your coffee into a plastic cup. No one is going to stop you.
The real question is.. should you be doing it?
It is not unknown that there are some health concerns when you heat up certain types of plastic. So today were going to dive into the nitty gritty of the plastics world!
We will cover what these cups are made of, potential health issues, and some alternative options that may be better for you and the environment.
So, without any more introduction, here is the answer to the question…
Can you (or should you) put hot coffee in a red solo cup?

To kick off answering this question, we need to learn about the world of plastics. Which types are good to use, which to stay way from and when they start to melt.
The Seven Main Plastics
There are seven different categories of plastics that we mainly use. If you look on the bottom of your Tupperware or plastic coke bottle, you’ll probably see the recycling symbol with a number inside of it.
That number represents what type of plastic material the item is made out of and if you can recycle it.
The seven main plastic types are as follows.
- Polyethylene terephthalate (PET)
- High density polyethylene (HDPE)
- Polyvinyl chlorine (PVC)
- Low density polyethylene (LDPE)
- Polypropylene (PP)
- Polystyrene (PS)
- Bisphenol and others
The most commonly used plastic is plastic #1 or PET. Water bottles, Gatorade bottles and condiment bottles are made up of this type of plastic.
You will also find a number of cups being made from #4 (LDPE) or #6 (PS) plastics. These will be your typical plastic or Styrofoam cups.
Since each plastic has a different purpose, there are a few that are suitable to use for food and drink while some you should definitely stay away from.
What are red solo cups made of?
Solo Cup has a few different types of disposable cups on their website. These are the classic red plastic solo cup, a see-through colored version and a run of the mill plastic cup.
The clear cups are listed as being made with the #1 plastic (PET) that we just talked about while the red solo cups & see through colored cups are made with a #6 plastic, or polystyrene.
Both plastics are able to be recycled and are reported to be BPA free.
Bisphenol A or BPA’s are found in many plastic & metal items we use every day.
Over time, pronounced negative health effects such as hormone disruption and low vitamin D levels have been linked to BPA consumption.
Since then, it has been advised to stay away from BPA’s whenever possible.
Melting point of plastics
A very important things to keep in mind when it comes to plastics is their melting point.
When plastics are exposed to heat, they degrade faster leading to toxic chemicals leaching into the environment around them.
Plastic #1 (PET) has a melting point of 255 degrees Celsius (491 degrees Fahrenheit while plastic #6 (PS) has a melting point of 100-120 degrees Celsius (212 to 248 degrees Fahrenheit).
These temperatures may seem extremely high, but in reality, the boiling point of water falls at 100 degrees Celsius or 212 degrees Fahrenheit.
Note: This temperature drops the higher above sea level you go.
So, if you find yourself in Colorado, the boiling point of water may be closer to 95 Celsius or 209 Fahrenheit due to the high elevation.
With coffee experts arguing that the ideal temperature for a cup of coffee is around 160 to 185 degrees Fahrenheit, the melting point of plastic #6 (and red solo cups) is not far off.
Potential health problems from using plastic cups

Plastic Leaching & Micro-Plastics
One of the main concerns when it comes to putting hot liquids in plastic cups is plastic leaching and microplastics (a term I’m sure you’re familiar with)
Both definitions are as follows:
Plastic leaching: when the chemicals from the plastic leak out into the surrounding environment.
Although plastic leaching is inevitable, it is known that heating plastics only increases the amount of leaching that occurs.
Microplastics: tiny plastic particles that result from both commercial product development and the breakdown of larger plastics
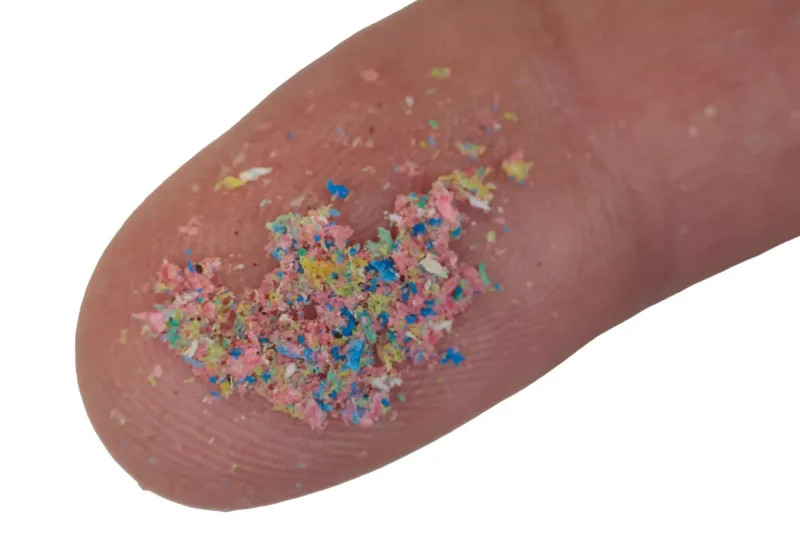
It may seem like microplastics would not be an issue when it comes to using plastic cups, however, a recent study testing the level of microplastics found in liquid before and after being in a plastic found:
the microplastic abundance in water reached 723–1,489 particles cup−1 after 5 min exposure and increased significantly with increasing residence time
Think you can drink your coffee before the plastic degrades?
Sudha Goel, an assistant professor from the Indian institute of technology, stated that
In the 15 minutes it takes for (hot) coffee or tea to be consumed the microplastic layer on the cup degrades and releases 25,000 micron-sized particles into the hot beverage.
Essentially, this means that when using any plastic cup, especially with a hot drink, you will be most likely be consuming microplastics and any chemicals leaching from the plastic cup.
Chemicals Released
Many of the extremely harmful chemicals found in plastics are thankfully not used in food & drink items.
However, there are still many chemicals that are found our everyday plastic items.
Nonylphenol is a plastic found on the “chemicals of concern in plastics” produced by the Australian government back in 2021.
Unlike many of the other chemicals on the list that are found mainly in PVC, this chemical is found is Polystyrene or plastic #6.
If you remember from earlier in the article, this is the plastic that red solo cups are made out of.
Common chemicals that can be released as well are BPA’s and phthalates which can lead to other health concerns such as lower fertility rates.
Thankfully, as we discussed before, red solo cups are BPA free.
Side effects from ingested plastics
Obviously, plastics were never made to be ingested. So, the side effects that come with ingesting microplastics and chemicals from plastic cups cannot be great for us.
The Endrocine Soctiey states that the chemicals leached from plastics can contain “endocrine-disrupting chemicals (EDCs)”.
These can harm the body’s hormone system leading to a variety of health issues such as cancer and diabetes.
These EDC’s can stay in the body for an extended period of time and cause “cumulative effects over your lifetime.”
Environmental Impacts

The environmental impact of plastic cups brings us back to the microplastic argument.
Plastics are everywhere in our day to day lives. So much so that there is a garbage patch in the middle of the ocean that is filled with plastic we just can’t seem to get rid of.
Plastic cups can be fantastic because of how inexpensive and convenient they are. However, being a single use plastic item, their impact on the environment adds up quickly.
To put it in perspective a bit more, research found that in the United States back in 2020, “219.73 million Americans used disposable cups and plates in 2020”
Even further, it was found that the entire world “produces around 350 million tonnes of plastic waste each year”.
If you multiply that by the 0.5% of plastic that ends up in the oceans, you get 17,500,000 tons of plastic still making their way in the ocean each year.
The Coffee Experience
Taste Difference
Obviously one of the biggest factors into a good cup of coffee is the taste!
Have you ever used a cheap coffee machine and found it tasted slightly off? Have you left a bottle of water in the car and when you tried it the taste was a bit funky?
This change in taste happens when plastic, especially when its heated, and starts to degrade. Therefor your quality of coffee might decrease if you decide to put it in a plastic cup.
Temperature Retention
Each material has different insulating properties, meaning each material can keep hot for different amounts of time.
Metal has a very high insulating property, hence why if you get a quality metal thermos, your drinks will stay long for ages.
This property is a one of the many downfalls of using plastic cups for hot beverages.
Although the plastic cup will keep your beverage hot, it only will do so for around 1-2 hours according to The Commons.
This is a short amount of time compared to the better alternatives we are going to discusses further below.
Alternatives To Red Solo Cups

The good news is that there are so many other options for the type of cups you can use to avoid some of the negative health effects that come with plastic cups.
Some of the more popular options are as follows:
- Glass mugs
- Stainless steel tumblers
- Ceramic cups
- Disposable paper cups
How to choose the right alternative cup
So, you want to make the switch! Congratulations! There are a few different factors to consider before investing in a new travel or reusable coffee mug.
1. Price point
Thankfully at this point in time there are so many reusable cups out there, you can find one at pretty much any price point.
I have found that the majority of reusable coffee cups are in the price range of $10-30 USD, with the higher quality items, like this Stanly, being at the upper end of this range.
A quality reuseable mug may seem like a big investment at first but trust me it pays for itself overtime.
An additional bonus is that many coffee shops offer discounts when you bring it your own cup, so you can save a bit of money on your morning coffee as well.
Tip: If you don’t want to splurge just yet, a popular choice (and one of my favorites) is this Contigo mug. It’s inexpensive and good quality for the price!
2. Durability
I have added this section purely because I am a major clutz and I’m sure a few of you out there are as well.
Some of the most popular takeaway cups on the market, like this Keep Cup, are made of glass or ceramic materials.
These materials are all fantastic alternatives to plastic as we discussed above, but depending on you as a person, some may be better than others!
As I mentioned above, I tend to be prone to breaking things, so having an extremely breakable travel mug is out of the question for me.
So, before you buy one, think about the likelihood of you dropping it or it getting damaged in your day-to-day life.
3. Heat retention
Obviously, this is one of the most important things. No one wants a cold cup of coffee!
I have had travel mugs that kept coffee hot for over 6 hours and some where you had an hour to drink it before it goes luke-warm.
If you want your coffee to stay hot for longer periods, think getting a travel mug in the higher price range.
These typically keep liquids hot for ages and you’ll never have to worry about cold coffee again.
4. Size & Bulkiness
Some companies specifically make their cups to fit cupholders in cars while some you’ll have no chance of getting it to sit in that cupholder.
The size and width of the bottom of the cup may be something to consider if you’re constantly in situations where you need to set it down but have limited space.
Many companies offer various sizes in each model of their mugs, so take a peek to see if your preferred brand has one that works for you!
Bonus: There are cup holder adapters now! Click here to check out a popular option.
Summary: Should you be putting hot coffee in a red solo cup (or any plastic cup)?
Like I mentioned in the beginning of this article, you can absolutely put hot coffee into a red solo cup or any plastic cup for that matter! No one is going to stop you.
Although there are a few benefits to using plastic cups such as convenience, there are some major negatives to putting hot liquids into plastic cups such as
- health risks from plastic leaching and microplastics
- environmental impacts
- taste & quality changes
Because of these risks and negative impacts from using hot drinks in red solo cups, there are some better alternatives out there.
If you’re on a budget, try using solo paper cups.
You don’t have to spend a lot up front, but you still protect yourself from the potential chemical exposure from warm plastics.
Glass, stainless steel, and ceramic mugs travel mugs are also fantastic environmentally friendly alternatives, though the price may be a bit higher.
All in all, I would only recommend using red solo cups for cold beverages only as recommended by the company.
It may be a bit less convenient, but it may be worth it in the long run.
As always, thank you for reading today’s article! Do you have a favorite reusable mug? Tell us below in the comments!
You may also enjoy these other articles on the Procaffinator website.
- Get a Great Deal on Travel Coffee Mugs With Your Student Discount
- 3 Reasons Why You Shouldn’t Pass On McDonalds Coffee
- Coffee For a Cause: Give Back with Each Cup of Coffee
Do you love cafes? Follow the Procaffinator Instagram to see cafes all around the world!
Have a great rest of your day and keep on procaffinating!
Sticky Blends: Add Some Spice to your Life
Sticky Blends is a small business based in Geraldton, WA that was born back in 2018 after the owner was inspired to share “her love for flavor with the community around her”
The response to this inspiration was a line of drink pastes that would be not only delicious and easy to use but also free of additives and non-beneficial ingredients that we see a lot in our everyday foods.
Since starting with just two main drink pastes, Sticky Blends has successfully grown and now offer a fabulous selection of six different drink pastes in total.
- Masala Chai (Vegan)
- Turmeric (Vegan)
- Chili Cocoa
- Dandy Masala
- Matcha
- Beetroot
Sticky Blends: The Power of Spices
Throughout time, spices have been known to provide anti-inflammatory & heart healthy benefits to those who use them.
Common spices like ginger, cinnamon and turmeric, are some of the most well-known spices to have been used for medicinal purposes throughout time.
Sticky Blends drink paste is a perfect way to get a variety of spices into your body with no additional bad ingredients.
Activating The Spices
One of the things I noticed when looking through the (short!) ingredient list, was that pepper has been added into the turmeric sticky blend.
This may not seem like a big deal, but just because you add turmeric to a drink, doesn’t mean your body is actually absorbing the spice (this is the issue with turmeric lattes!)
Alot of spices out there can be really good for your body, but they need to be “activated” in order for you to benefit from them.
Turmeric, in this case, can be activated by a number of things, including pepper.
So, not only are you getting a healthy spice blend in each spoonful, but you are also actually getting to reap the benefits of the spices due to the other ingredients in the blends!
For full transparency and ease of access, you can find all of the ingredients for each item are listed on the Health & World Being website.
Ingredient Transparency
Each ingredient used in the drink pastes are certified organic with common ingredients being ground ginger, black tea, ground cinnamon, star anise and cardamom pods.
Beyond being organic, the two original drink pastes, Turmeric and Masala chai, are both additionally certified vegan products.
The pastes additionally stay low calorie and low in sugar with the Chili Cocoa drink paste boasting only 114 Kj (27 Cal) and around 5.6 g of natural sugars per 9 grams (about 1 serve) used.
Thoughts on the Chili Cocoa Drink Paste
I came across the Sticky Blends booth one morning at the Kalbarri Holiday markets.
As an avid chocolate lover, I decided to try the Chili Cocoa drink paste.
The paste itself is much thicker than I expected so the recommended boiling water is definitely needed when dissolving the paste into your drink of choice.
Alternatively, if you’re more of a cold drink lover, you can mix the drink paste into boiling water and then refrigerate it for later to use as you please!
I ended up using the paste in a few different ways:
- Mexican Hot Chocolate
- Mocha
- Chili Cocoa Tea
I Initially added the drink paste to my coffee and was greeted with very bold chili flavors. After a bit of research, I found I had used twice as much drink paste as I was supposed to, which explained the spiciness.
After properly following the instructions and only using 1/2 tsp per 8oz of milk/water, the chocolate and chili flavors were nicely balanced, providing a much “warmer” feeling drink.
Flavor Notes:
- Strong chili
- Mild chocolate
- Hint of cinnamon (specifically in tea form)
This drink paste is absolutely delicious added to coffee, hot chocolate, or on its own. The cinnamon in the spice mix added a layer of warmth and comfort that would be perfect on a chilly night.
If you want a bit more of the spice kick I initially experienced, try adding 1 tsp of the paste to your drink of choice.
Summary: My Recommendations & The Future of Sticky Blends
The Future of Sticky Blends
After speaking to the creator of Sticky Blends, the future looks bright for the company as they hope to keep expanding in the coming years.
Thankfully, this is not a case of, “you need to be located in western Australia to purchase this product!”
Sticky Blends does have an online store through the Health and World Being website. You can bulk buy or just pick one or two you want to try.
You can also follow the Sticky Blends Facebook page to find them at markets around the coral coast in WA just like I did.
My Recommendation
As someone who drinks tea occasionally but doesn’t dabble with strong spiced flavors, I was very impressed by the Chili Cocoa drink paste I tried.
I think the company has accomplished exactly what they had hoped by creating a delicious and clean product.
It was a step outside my coffee comfort zone but the most important thing for me is being able to add the benefits of the spices to my morning routine.
I would definitely recommend trying out the chili cocoa drink paste if you want to add an extra kick to your favorite drink or just love a warm drink on a cold night.
The serving size is an additional bonus as you can get around 200 servings from one jar of the paste, making it a great “bang-for-your-buck”
As for the other drink pastes, I would recommend giving them a try as well as I have confidence that they will be great based off of my experience 🙂
Note: I’ll update this review if I have the chance to try more of the product line!
That’s all for today guys! As always, I hope you have a fantastic rest of your day and thank you for reading todays review. Happy Procaffinating!
Have you tried Sticky Blends before? Leave a comment to share your experience!
Black vs. White Coffee: Which is right for you?
I’ve said it before and I’ll say it again, the easiest way to avoid having a bad coffee is to know which one you will like.
The way to do this? Learning the basics of coffee. Like every other subject, coffee can be broken down into many smaller categories: such as roast type, espresso, drip coffee and so on.
I’m going to be completely honest and say that I initially thought white coffee was just another term to talk about lattes, flat whites & other milk drinks. but it is far from it!
Today we will be learning about the 3 main roast categories and specifically what white coffee is.
There will also be some common flavor notes for the main roasts on the market to help you decide which roast might be the best for you!
So, without further ado…
Black Vs. White Coffee: What's the difference?
Now, before we get into discussing anything, you need to learn about the process of roasting coffee beans. Hint: It’s the most important step in making coffee
Coffee Roasting & The Most Common Roasts
The coffee roasting process is one of the most important steps in creating a great tasting cup of coffee.
Without this process, the coffee beans would stay green (yes, green!) and would have no taste, smell, or pretty much any flavor profile.
The flavors & smell that coffee lovers adore, comes majorly from the roasting process.
The roasting process can be incredibly complex as it varies from roaster to roaster and essentially is a giant chemistry project to make great coffee.
So, to start, we are going to take a quick peek into the three main coffee roasts to see how they are roasted. This will set the baseline for talking about black and white coffee late on.
Do you already know about the coffee roasting process? Click here to skip learn about white coffee!
The Three "Pillar" Coffee Bean Roasts
The majority of coffee on the market will fall into three main roast categories: light roast, medium roast, and a darker roast.
There are many more types of coffee beans that fall into sub-categories of these three.
For instance, you will find your city or cinnamon roasts in the light roast category. But for the most part these are going to be your three most commonly seen roasts on the market.
The coffee roasting process only begins after the harvested beans are processed and dried. After this has been done, the green coffee beans will be placed in roaster.
The amount of time the beans are roasted depends solely on the type of roast the company is trying to achieve.
In general, the green beans are roasted anywhere from 356 to 482 degrees Fahrenheit over a period of 7 to 20 minutes. As you might expect, the longer the beans stay in the heater, the darker the roast it will be.
Note: Black coffee is defined as a dark roast or darker roasted bean.
During this roasting period, a chemical reaction, called the Maillard reaction, takes place between the sugars and amino acids in the unroasted coffee beans.
This reaction creates the delicious flavors we coffee drinkers know and love!
Note: If you want to learn about the nitty gritty of coffee roasting and more about the Maillard reaction, check out the following posts & videos!
- Coffee roasting explained – Youtube Video
- An Introduction to the Maillard Reaction
- The Ultimate Roasting Guide
Now, a very important point in this roasting process is called the first crack.
At around 385 F, a cracking noise will occur when a lot of the moisture inside the beans has evaporated and needs to escape.
This first crack is important to roasters as the coffee beans have approached the stage of being a light roast once it happens.
Now, because the beans are roasted for different periods of time, the flavors vary from roast to roast. Acidity and bitterness are two major flavors that change with how long the beans are roasted.
Below is a breakdown of the flavor basics for each main roast.
P.S. this is a great way to see which type of coffee you may like! I personally hate acidic coffee so I almost never go for a light roast.
- Light Roast Coffee: roasted at about 356-401 F for 5-7 minutes
- least bitter
- more “origin characteristics” (unique flavors from the area the coffee beans were grown)
- Medium Roast: roasted at about 410-428 F for 8-10 minutes
- a middle ground for acidity and bitterness!
- bright flavor profiles
- Dark Roast Coffee: roasted between 464-482 F for 12-15 minutes
- most likely to have a strong bitter taste
- many dark roasts taste similar as the origin characteristics are lost due to the high heat
- Produces oily, black beans depending on how dark the roast is
What is white coffee & where did it come from?
Now that we’ve covered the basics of roasting and the most popular roasts, what exactly is white coffee?
I was surprised to find out that white coffee isn’t a type of drink like a latte or flat white.
Instead, white coffee is a roast of coffee that is even lighter than a light roast coffee.
Like I said earlier, there are the three main roasts when it comes to coffee, but there are many coffees that fall within or outside of these roasts. White coffee is a great example of this!
This extremely lightly roasted coffee originated in the middle east in Yemen, back in the early 1900’s, and was initially combined with hawaji, a spice mix from Yemen.
Hawaji, made up of cardamon, turmeric, cinnamon and more, deepens the nutty flavors of the drink while adding an earthy component as well.
If you want to try out Hawaji for yourself, you can find a great recipe here!
White coffee is typically only roasted at low temperatures, between 300 and 325 degrees Fahrenheit, and only for 5 to 6 minutes.
Now, the beans do undergo some of the roasting process, hence the color change from green to white, but they are taken out of the roaster before that important first crack.
What does white coffee taste like?
Now, as we mentioned, the beans don’t undergo “first crack” with white coffee, so unlike your typical coffee beans, white coffee has a unique flavor profile that is much more consistent, and subtle.
White coffee has been known to be more acidic than other coffee roasts and also have a nutty flavor component to the roast as mentioned before.
Due to the short roasting process, this roast has almost no bitter aftertaste to it!
I personally have yet to try white coffee so these flavor notes are based off of other people’s experiences and research, but hopefully I will get my hands on some soon!
Why is white coffee becoming more popular?
Although I have yet to come across white coffee in my day-to-day life, the better health benefits of white coffee and increased caffeine content have helped popularity grow over the years.
Let’s go back and talk about that important roasting process now. There are two more topics that come into play with the popularity of white coffee: caffeine content and chlorogenic acid.
Caffeine Content
Remember when I talked about how the first crack happens because of some liquids in the green coffee beans evaporate and need to escape?
The caffeine in the coffee beans makes up some of the liquid that evaporates as the beans are heated.
Therefore, when the beans undergo a shorter roasting time, the higher the caffeine content will be.
White beans will have a higher caffeine content as they are roasted at a much lower temperature for a short amount of time. Comparatively, black coffee beans are roasted at higher temperatures for longer. Thus, more caffeine evaporates, and you are left with less caffeine in your cup of coffee.
Now although there is a difference in the caffeine levels, it is not drastic.
According to Latte Love Brew, the difference in how much caffeine is in a normal espresso shot vs a white coffee espresso shot is only around 4mg of caffeine.
but hey! when you’re looking for a caffeine kick, an additional 4mg doesn’t hurt!
Chlorogenic Acid
While you may have not heard about this ingredient in coffee beans, you probably have heard of the term antioxidants.
Antioxidants are found in a variety of healthy foods that you and I probably try and eat on a normal bases, such as fruit, veggies, whole grains and so on.
The antioxidants found in these foods are known to help your body stay healthy by fighting off free radicals.
Free radicals, or unstable atoms can occur in the body from a variety of things such as smoking and alcohol and can cause damage to the healthy cells in your body over time.
Some health issues that have been linked to free radicals going rogue are:
- Cardiovascular diseases
- Rheumatoid arthritis
- Aging skin (including wrinkles and sun spots)
So obviously making sure you have enough antioxidants in your diet is important!
Fortunately, chlorogenic acid is one among them, giving coffee an excellent source of antioxidants.
The chlorogenic acid content in coffee, like the caffeine content, drops as the beans are roasted. As a result, lighter roast coffee has more antioxidants.
This just means that white coffee and other light roasts, aid in weight loss and have more health advantages over darker roasts of coffee.
So, you want to try it... where can you find it?
While you can try to hunt it down in your local coffee shop or grocery store, your best bet for a guaranteed find will be buying it online or at a specialty roaster.
Now, since I haven’t tried white coffee myself, I unfortunately have none to recommend, but Brew Smartly has put together a great list of their 5 recommended white coffee beans for 2023 that you can read here.
If you don’t feel like reading another article, here is a summary of a few of their recommended beans!
- Poverty Bay Coffee Co. White Coffee
- Wired Willey’s White Coffee
- Caffe Appassionato Ground White Coffee
Note: The unique roasting process makes white coffee beans much harder and dense than regular coffee beans. Because of this you will need to have a special coffee grinder if you purchase a non-grounded bag of beans. I came across this article that has a great step-by-step guide on how to brew the best white coffee at home.
Final thoughts on the differences between white and black coffee
The roasting process has so much influence over how the flavor of your cup of coffee will develop. The caffeine content, although slight, does change with the roasting process as well as the acidity and bitterness the beans will produce.
Below is a side by side comparison of the main differences between white and black coffee!
White coffee is an extremely light roast that undergoes substantially less time in the roaster than other roasts of beans, creating a distinct nutty flavor that many people love.
The additional antioxidants found in white coffee only adds to the appeal and this roast has been officially added onto my list of new coffee drinks to try!
I hope you give it a try if you come across it, and if you do, drop a comment below to share your experience!
As always, thank you for taking the time to read today’s post! If you want to learn a bit more about the world of coffee check out these related articles:
- The 8 most commonly ordered coffees (and what they are!)
- Who Makes (the surprisingly great) McDonald’s McCafe Coffee?
- Coffee For a Cause: Give Back with Each Cup of Coffee
if you haven’t already, check out the Procaffinator Instagram here for cafe review & coffee content!
I hope you have a great rest of your day and keep on procaffinating! 🙂
8 Coffee Essentials to Stock up On During Amazon's October Prime Day
Prime day is back ladies & gentlemen! Coming up shortly is October Prime Day a.k.a Amazon's Big Deal Days.
The deals this October will run from October 10th – October 11th , so you will have 48 hours to access all of the fantastic discounts.
This is a perfect time to do a bit of extra shopping before the holidays and to grab any essentials you may have missed during July’s Prime Day.
This post may contain affiliate links, meaning I earn a small commision (at no extra cost to you) if you decide to purchase anything through one of the links :)
What do you need to shop during October Prime Day?
Before we get into the list of coffee essentials you may need, here is what you need to have to participate in this year's October Prime day:
YOU NEED TO BE AN AMAZON PRIME MEMBER
That’s it!
And the best part of it is, especially, if you're on a budget, you don’t even have to pay to join.
You can snag the next day shipping, discounts, and more using the 30- day free trial Amazon offers.
Amazon offers a 30-day free trail if you're signing up with a new account so you can sign up for the awesome prime day deals and cancel your subscription if you don’t want to pay the $14.99/month to stay a prime member.
If you’ve already signed up for prime in the past and can't access the 30-day trial, maybe try digging out that cringy email address you made in 5th grade to get the great deals.
Here are nine coffee essentials to keep in mind during your prime day shopping spree!
Travel & Insulated Coffee Mugs
Having a great takeaway/travel mug is so beneficial. You can get a discount at your local coffee shop for bringing in your own cup and help save the environment at the same time!
Yeti and Contigo are two of my favorite brands that I would recommend to anyone looking for a new travel mug.
Eco-Friendly Takeaway Cups
If you don’t feel like investing in a good takeaway mug, you can grab some of these recycled takeaway cups to take your home brew with you.
Note: Many of these cups come in packs of 100 so be sure to check the amount you're buying!
Coffee Filters
If you make coffee at home, you know how fast you can go through coffee filters. This is a chance to save a bit of money and stock up on something that you use every day!
Pour Over & Drip Coffee Equipment
Drip coffee is one of my favorite things to make at home, especially using this Clever Dripper. You can just pour the water in with the grounds and leave it be for however long you want. Once you’ve let your coffee brew for long enough, just place it onto of your favorite mug and the coffee will come out!
Pour over coffee is also perfect for those who don’t need to make 8 cups of coffee at a time. The amount of coffee I wasted in college due to not having a pour over coffee is.... unfortunate.
Coffee Makers & Home Espresso Machines
This is the time to save some BIG money if you’ve been looking at getting a new coffee maker or home espresso machine. In the past, some espresso machines have had discounts of $100, so if you have been thinking about getting on, now is the time!
As I write this, this Phillips LatteGo Machine is $300 off and it’s not even Prime day yet!
Coffee Mugs
Great. Coffee. Is. Better. In. Adorable. Coffee. Mugs.
With Halloween right around the corner, now would be a great time to stock up on your favorite Halloween mugs to upgrade your home coffee bar.
Not a Halloween fan? That’s okay! You can stock up on all the cups you accidentally broke earlier this year. Everyone is a winner with a coffee mug sale
Your Favorite Coffee Beans & K-Cups
An obvious essential, coffee. K-Cups of all roasts & brands have been on sale during past Amazon Prime Days so fingers crossed they will be for this event as well! While you’re shopping, you may as well see if your favorite coffee roasters have a sale going on.
Organizational items
Sugar, ground coffee, coffee beans, K-cups, syrups. There are so many items that you can put in cute organizers to help cut coffee bar clutter. A little bit of organization goes a long way!
Pro Tip: Don't miss your favorite items!
Make sure you don’t miss your favorite items by adding anything you want to your Amazon wish list. You will have easy access to these items during the 48 hour sale and won't have to stress!
Good luck & happy shopping!
Indie Coffee: A Review of One of Madison's Best Coffee Shops
Ever since its birth back in 2004, Indie Coffee can definitely be considered one of Madison's staple coffee houses. Being located near Camp Randall, it has grown to be a must stop for locals and a great study location for college students.
Unlike many cafes, Indie coffee is extremely well known for the waffles they make in house.
Yes, that's right, Waffles.
Because of this delicious breakfast item (and others), I have been to this cafe many times over the last few years and am beyond excited to be writing this review!
A Peek into Indie Coffee: One of Madison's Best Coffee Houses
The Atmosphere
In my opinion, Indie Coffee is 100% a cafe that conquers both the relaxing and energizing environment. This is done through having a busier indoor seating area of about 8 tables as well as a shady outdoor patio area.
While the indoor area can definitely get crowded when it gets busy, the tables are spaced apart enough to avoid having that claustrophobic feeling we all hate. They also have window seating that allows you to avoid the line out of the door a bit better.
The patio seating outside is absolutely perfect for the warmer months, especially if someone brings their dog with them (when does a dog not make an experience better?)
The patio is also the perfect place to escape to if the inside gets too noisy for your liking.
'
'
All in all, the coffee shop can be a bit chaotic sometimes as the indoor space is smaller than most other cafes in the area. However, I find the busy energy inside can definitely help you push forward with studying, even when you're exhausted.
If you're looking for a quieter experience, try coming in during the week after the morning rush.
Coffee & Beverages
I have had everything from Indie's drip coffee and cold brew to a lavender & honey latte (named the Monet Sunrise) and none of it has even slightly disappointed yet.
They offer three different drink sizes, all named after the beautiful Wisconsin Lakes (Wingra, Mendota and Monona).
I personally love drinking coffee out of a huge coffee mug, and that's exactly what you'll get when you order the "Mendota" size or 20oz coffee.
Do you love coffee mugs? Check out my post on adorable animal coffee mugs here!
Indie has some great seasonal options available along with the classic espresso-based drinks such as:
- The Twist (a mix of espresso, milk, Ghirardelli caramel and vanilla)
- The Milano (a slightly sweet latte that has vanilla and cardamon flavors)
- A Mayan Spiced Mocha (Ghirardelli dark chocolate, cinnamon, and cayenne)
Note: They also offer six different types of milk for those with dairy intolerances!
'
'
If you do stop by and find you love their coffee, you can purchase the "Indie Coffee" dark roast both in the shop or on their website.
Note: This darker roast will typically come as a whole bean unless you would like it pre-ground.
If you're after something a bit stronger than coffee (as a typical Wisconsinite probably is), their website claims that they are re-introducing a new menu that includes:
microbrews, wines, and spirits such as Jameson whiskey, Kahlua and Baily's
I personally haven't ordered anything alcoholic from this coffee shop but I'm sure it only adds to the experience.
The Food
Oh, the food. This is honestly the best part about Indie Coffee. They absolutely nail their food items by elevating simple savory breakfast staples.
The Mediterranean wrap? Divine.
The breakfast bagel? Extraordinary.
While it might take a bit longer to receive your order, their food hits the "comfort food spot" of the stomach every time. They also have a number of Gluten Free, Vegetarian & Vegan menu items for those with food intolerances or preferences.
Now... let's talk about the waffles that were featured on Wake Up with Al Roker back in 2015.
What makes these waffles so great, is the simple base that comes out crunchy in the right spots and fluffy in the middle.
I'm not sure if they have a secret ingredient thrown in there that helps create this masterpiece but what I do know is that if you're getting a waffle anywhere in Madison, you need to stop at this coffee shop.
With each fantastic waffle, you will receive a few pats of butter on the side that are perfectly warmed from the heat of the waffle, along with some delicious syrup.
I personally go for the grasshopper waffle (a buttermilk or wholegrain batter with walnuts) but if that's not for you, you can take a look at their other 5 options and pick what would be best for you!
Some of their other popular waffles are:
- The Red & White (a waffle topped with strawberries and house made whipped cream, inspired by UW-Madison's colors)
- Chocolate Chip (self-explanatory & delicious)
- Cranberry & Walnut (for those wanting to be a bit healthier in the morning)
Indie Coffee: One of Madison's local businesses that you need to visit
As you can probably see now, Indie Coffee is a must stop the next time you're in need of a coffee or a snack. The range of coffee beverages they offer, from classic to seasonal, makes this a versatile cafe with something for everyone.
They are also open from 7am-6pm every day, so you can stay late and study or just enjoy your morning coffee here.
P.S if you're a student in need of a new reusable coffee mug check out my list of brands offering student discounts!
I highly recommend the food options here as well but keep in mind, you may be waiting a while for your takeaway coffee or food item if its busy. So, if you're in a rush, try and plan ahead (or order online here!) so you don't end up missing anything!
As always, thank you for taking the time to read this review and happy procaffinating! :)
Related Articles:
Staying in Madison for a while? Check out the top things to do here!
We've covered coffee but if you're after some dinner check out these 15 recommendations
Are you a student? Take advantage of your discount on these travel mug brands!
The Ultimate Guide to the Best Cafes in Daylesford
Being a short 90 minute drive from Melbourne, the towns Hepburn Springs & Daylesford have become a staple holiday location for many people. The two close towns have many things to offer, from the iconic mineral springs bath house in Hepburn to the fantastic art galleries show casing some incredible artists in Daylesford.
Whether you’re here for school holidays, or just need a chance to unwind from the city life, this ultimate guide to the best cafés in the area will help you find the perfect way to start your morning (or afternoon if you feel like sleeping in)
Note: there will be a summary at the end of each section :)
The Ultimate Guide to the Best Cafe's in Daylesford & Hepburn Springs
Table of Contents:
- Harry's Hepburn - Best for families, large parties, & working
- Harvest Cafe - Best for healthy drinks/specialty coffees
- Larder - Best for starting the morning on a positive note
- Cliffy's - Best for a brunch date (best overall)
- Wombat Hill Cafe - Best for pastries & nature
1. Harry’s Hepburn: Best Café for Families, Large Parties, & Working
Open 7 Days a week 8am-3pm, kitchen closing at 2:30pm
115 Main Road, Hepburn Springs
Seating & Atmosphere
Although I find the café on the smaller end compared to the ones I visit at home, Harry’s Hepurn is one of the largest cafes on this list, with a variety of seating options.
There are numerous tables capable of seating larger parties (4-8 people) and many smaller tables available, though you may have to squeeze at some points. If you make a booking, they can accommodate large parties (10-14 people if not more).
In the summer, the coffee shop also has a lovely courtyard / beer garden where you can take your dogs and enjoy the sunshine if you don't feel like sitting at one of the outdoor tables along the front of the cafe.
If you’re visiting on a weekend, I highly recommend making a booking through the Harry's Hepburn website as it can become very chaotic quickly.

Coffees & Other Beverages
The coffees are a standard size here with a regular/cup (single shot $4.50) and large/mug (double shot, $5.50) with upcharges for any alternative milks or additions. P.S. they have some of the best hot chocolate in the area!
Additionally, the café has six milks in total so you are sure to find the right milk for your drink!
Milks offered: Full Cream, Skim, Soy, Oat, Lactose free & Almond
Harry's also has one of the larger ranges of drinks I have seen with not only coffees, but juices and alcoholic beverages as well for those who want to get the party started early in the morning.
The prices on the drinks vary but range between $9-$18
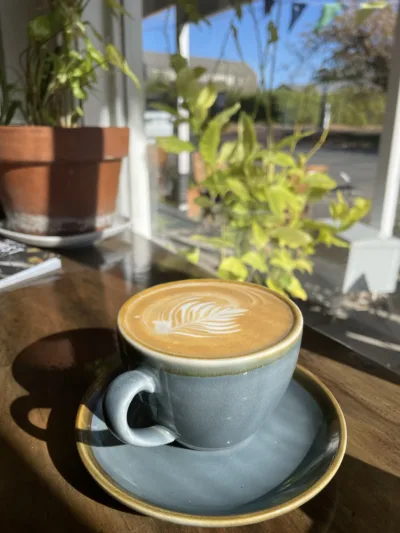
Food & Small Bites ($15-$30)
Like many cafes in the area, Harry serves what I would consider the food selection at Harry's to be high end café cuisine.
The menu, created by the chef of Frank and Connies down the road (highly recommend this restaurant for dinner as well), features popular items such as the Salmon & Potato Croquette and the Open-Faced Steak Sanga, an absolute beast of a sandwich.
This café also serves the classics such as crumpets and eggs on toast for those who don’t want to stray too far away from a normal breakfast.
There is also a small kids menu option with basics of eggs on toast and fried chicken & chips (which is absolutely delicious)
Prices vary for the food items but tend to sit on the higher range of $15-30 depending on add on’s or substitutions.
If you’re not after a full meal, there is a number of house made cakes and treats to choose from such as Portuguese tarts, duck pies, cinnamon scrolls (my favorite) and more.
Vegan, Veggie & other health-conscious options
The menu contains a variety (that’s right, more than just one or two!) of vegetarian, vegan, gluten free AND dairy free items! As far as the cake & treats section goes, I know of two gluten free options (the citrus teacake & brownie), but no dairy or vegan options at the moment.
Summary:
- Pros:
- Great place to get work done, study, or have a meeting at. There are plenty of outlets if needed!
- Accommodates large parties
- Kids menu available (only booster seats available, no high chairs)
- Local Special on Thursdays: A big breakfast + a standard coffee/tea for $25
- Cons:
- Can get very loud if busy
- Small upcharges like a side of cream (+$3) or scrambled eggs (+$2) can add up quickly
- Can be cold in the winter due to no central heating
2. Harvest Café- Best for healthy drinks/specialty coffees
Open Mon-Friday 9am-3pm, store open until 4pm, Sat 9am-2pm, store open until 3
Located: 29 Albert Street, Daylesford, Victoria
Located on the main street in central Daylesford, Harvest Café is a health food store & coffee shop rolled into one. You will be greeted with great customer service and overall good vibes from this heart healthy coffee shop.
Seating & Atmosphere
The entirety of the store is also a shop where you can find local favorites like beautiful soaps, wine and a number of other organic wholesale items.
With my first visit I initially thought this cafe wouldn’t be a good place to sit down and work, but after returning I found the indoor seating to be quite open & welcoming, especially when they have incense burning.
One big plus I found was there are two main seating areas, one with a couch and a more relaxed "friends" style vibe to it, while the other seating area is a larger room with much more seating. In this main seating area, there are a number of tables without it feeling cramped, and there is room to seat larger parties of 6 people if not more.
There are window/bar style seating in both rooms with outlets available if you feel like getting some work done!
Coffees & Other Drinks:
This is where the Harvest Cafe shines... here you will find the perfect drinks or coffees for if you want to add an extra health kick to your morning such as
- Turmeric latte (coconut milk, ginger, honey, turmeric, cinnamon) - $5.50
- Bulletproof latte (double organic espresso, organic coconut oil) - $6.00
- Blue Mermaid Smoothie (E3 live, banana, dates, coconut oil, sea salt, & almond milk) - $10.50
among so many other drinks to choose from, you can even add protein or cholorphyll ($3 each) to a juice as well to kick it up a notch.
I do not believe they sell alcoholic beverages to drink on site. I only saw some, mainly wine, for sale in their extensive retail section.
Food & Small Bites ($10-20)
The food selection at this cafe comes across as more "earthy" to me, with items such as:
- Thunderstorm porridge - $16
- Dynamite mushroom toast - $22
- Pumpkin & tarragon rice cakes - $3/each
This cafe splits up their food service by serving breakfast items from 9-11am and the lunch items (mainly soups and salads) until 3pm.
They also have a variety of other miscellaneous items such as the beef & veggie pastie, which I got and absolutely loved, as well as the savory slice which was on special for $5.
Their small snacks in the cooler section by the front till are UNBELIEVABLE. They have salads, wrapped dates, and a number of other items. Just absolutely excellent food here.
You can peak at their full menu via their website online here if you want to plan ahead!
Vegan, Veggie & other health-conscious options
To no one's surprise, Harvest Cafe caters wildly to the vegan and dietary restrictive community with the majority of their menu items and snacks being vegan or gluten free.
Summary:
- Pros:
- Bubbly customer service
- LOADS of healthy options & very dietary friendly
- Lower price point than other cafes for food
- Fantastic retail selection with local wines, vitamins, snack guides and more
- Cons:
- Not as cozy as some cafes
3. Larder - best for starting your morning on a positive note, work friendly
Open Friday-Tuesday 7:30am-3:30pm
Located: 57A Vincent Street, Daylesford, Victoria
Seating & Atmosphere
Larder is one of the only cafes that I have been to that radiates the exact happy energy you hope to start your morning with.
Between the upbeat but not annoying music and the abstract art and scattered bright colors around the cafe, I thoroughly enjoyed the atmosphere right after I walked in the door. Once of my favourite parts were the colorful umbrellas they have hanging on the ceiling above some of the tables!
In the main cafe area, there are only around 4 or 5 tables, most sitting 4 or more people. There is also some window seating avaiable as well as outdoor street seating for those who want to enjoy the weather.
In the second portion of the cafe, there is a much larger range of seating, both window and tables. This section has less of the cafe feeling and is more like a sit down restaurant in my opinion with a much more structured seating chart.
Coffees & Other Drinks
Larder has a range of coffee and alcoholic drinks similar to the other cafe's in the area. This cafe has great coffee, some of my favorite in the area, and a big plus was that it came with some beautiful latte art.
I actually did not grab enough intel on the exact selection of cocktails and wine that this cafe offers but I know the price point is similar to other locations.

Food & Small Bites ($15-$35)
Larder is cafe in Daylesford with yet another impressive food menu, with a larger selection of options with both Mexican and Asian inspired dishes alongside some of the breakfast classics.
They have unique dishes such as:
- Huevos La Flamenca (2 eggs baked in a braise of tomato, chorizo, & potato) - $23
- Asian fried tofu & noodle salad - $22
- Buttermilk Hotcakes - $18
They also have some of the classic all day breakfast items such as eggs on toast, for a reasonable price which I love to see.
Note: Larder does NOT allow any substitutions on their menu items
Vegan, Veggie & other health-conscious options
Larder has loads of options for a variety of dietary restrictions, especially if you have a nut or diary allergy. You can make a number of the menu items vegetarian, but there doesn't seem to be as many good vegan options in comparison to other cafes in the area.
Summary:
- Pros:
- fantastic coffee
- this cafe supports local artists
- best of both worlds with a cafe side & a more structured restaurant side
- Cons:
- less seating in the actual cafe area
- NO substitutions on the menu
4. Cliffy's Emporium - Best for a breakfast or brunch date, best cafe overall (in my opinion)
Open: Mon-Friday 7:30-3pm, Sat & Sun 8-3pm (kitchen closes @ 2:30pm)
Located: 30 Raglan St., Daylesford, Victoria
This is a cafe I visited on a rare Sunday morning when I wasn't working. Sunday's for the breakfast/cafe industry can be incredibly chaotic and thus I had prepared myself for a more rushed coffee but was I totally wrong.... Cliffy's was my personal favourite cafe out of the ones I visited and is a cafe i give a full 10/10 for everything.
Seating & Atmosphere
Note: I was sat in the entry way dining area, I later found out there was a 2nd inside dining area but I was unable to take a look while I visited, so, keep in mind this is just my experience in this first dining area.
This cafe would be the perfect place to have a brunch or breakfast date after your relaxing weekend in Daylesford or Hepburn Springs. The set up in the initial dining area provides a surprisingly intimate & cozy dining spot, with the majority of tables seating two people and the first dining area seating only about 20 in total.
The atmosphere was the definition of cozy with the heating at the perfect temperature and the noise volume low, even on a busy sunday. The walls were all completely filled up with a large variety of retail products, a plethra of flowers, and various knick-nacks contributing to the welcoming and cozy feeling.
One of my favorite parts were the herbs or ingredients hanging above the kitchen way. I'm unsure if these were actual ingredients the kitchen uses or if it was just for decoration but regardless, it adds such a warm feeling to the area.
There additionally is a massive outdoor seating area that can definitely sit larger parties as well as some undercover street side seating available for smaller parties.
Note: There is a second inside dining area I was unable to see that I believe can seat larger parties
Coffees & Other Drinks
This cafe serves exceptional coffee, using beans from Rosso Roasting Company. They charge the standard amount of the coffees, around $4.50 for a typical espresso drink.
Milk Offered: Full cream, Soy, Almond or Oat.
Cliffy's does NOT offer skim or lactose free milk
The rest of the drink menu consists of a range of beers ($9-$14), wines ($13/glass, $55/bottle), and cocktails ($14-$20).
If you're after a soft drink, they do have big brands such as coca-cola which some cafe's in the area do not.
One of the cocktails they offer that I think looks fantastic is the breakfast martini (Campari, gin, orange marmalade) $20. This one is definitely on my list for when I go back.
Food & Small Bites ($19-$40)
Expect to spend a fair amount if you plan on dining here, the food prices are much higher than the other cafes in the area, averaging around $30/dish. In return you can expect high quality ingredients & the overall fantatsic tasting food that matches the pricing.
Cliffy has a wide range of food items of their 16 item menu with a number of options that can be made veggie or vegan. They also offer gluten free for about half the menu options
If you're interested in grabbing a meal here (which I highly suggest) expect an upscale breakfast or brunch menu with a wide range of options from the classic Cliffy's benedict to a Japanese curry.
I ordered a Vego roll, which consisted of pumpkin, almond tarator, cheddar cheese & rocket and it was absolutely delicious, though the pumpkin might have been cut a bit thick. It was served with rosemary fries which were done perfectly.
Vegan, Veggie & other health-conscious options
Overall, they offer a fair amount of gluten free options and many vegetarian options as well. They have a few vegan options, but nothing too crazy in that department.
Summary:
- Pros:
- Such a warm and welcoming environment and so cozy
- Fantastic food & coffee
- Relaxing & quiet even when busy
- Cons
- Much higher price point than many cafes
5. Wombat Hill House - Best for Pastries & Nature/Natural Light Seating
Open: Friday-Tuesday 9am-3:30pm
Location: Enter off Central Springs Road, Daylesford, Victoria
Seating & Atmosphere
The Wombat Hill House Cafe has some beautiful seating options, with a few tables indoors, some by the cozy fireplace and the majority outside in their greenhouse styled outdoor seating. I did visit in the winter so once the plants and vines come back to life in the summer, its sure to be even more beautiful.
Though there is definitely space for larger parties, I think there is room to seat 2-6 the most comfortably, but when in doubt, be sure to call and make a reservation!
The inside is welcoming from the moment you step in, complete with a delicious smell, something my partner wanted me to mention.
Something small that i loved was the beautifully written signs around the cafe as well. There really wasn't a "rough" part to this must-visit destination at all. The nature decorations on the wall, including some butterflies hanging from the ceiling over one of the larger tables, paired with the table numbers staked in small potted plants all add to this nature centered cafe.

Coffees & Other Drinks
The coffees are again, pretty standard in both price and size (cup vs. mug) but come in these beautiful red matte cups (the small details matter!)
I found my coffee to taste almost a bit watery in comparison to some of the others from cafes but it was still delicious.
Wombat Hill House also offers a number of wines all produced in the state of Victoria, as well as beers, ciders, and cocktails ranging ($7-$18)
Alternative milks Offered: Full cream, Skim, Soy, Almond, Oat
Food & Small Bites
As stated above, I highly recommend this cafe for their pastries & delicious treats. They bake 5 days a week at the Dairy Flat Farm, the location wheere they also make all of their sourdough bread! The quality truly shines through on these as they are absolutely fantastic.
One notable thing about this particular cafe is that Alla Wolf-Tasker, a culinary genius from the area responsible for the awards behind the Lake House also found in Daylesford, supplies some of the produce used in the kitchen.
As stated on the Wombat Hill House website, the kitchen menu is seasonal and changes rather frequenty. However, the menu seems to feature some of the typical brunch food found in the cafes in the Daylesford.
Big breakfasts, and delicious avocado on sourdough as well as some more upscale classic foods like, proscuttio & roasted fig pizza, waygu burgers were found on the menu.
Vegan, Veggie & other health-conscious options
Again, it's hard to say what exactly they will have as the menu changes, but the website also states they will always have some options that are vegetarian and vegan friendly. Including fresh sandwhiches if that is what you're feeling!
Summary:
- Pros:
- Delicious Pastries
- Surrounded by the beautiful wombat botanical gardens so you can have a quick walk before/after your meal!
- Beautiful & relaxing atmosphere
- Heated outside seating
- Cons:
- None to mention!
The Best Cafes in Daylesford: Summary
There are so many great options for coffee and food when visiting the Daylesford area. I am happy to share these five cafes & coffee shops to be my favorite during my time in the town. You can see more photos of the discussed cafes on the Procaffinator Instagram here!
I hope you have a chance to visit one of them and enjoy the fantastic food and coffee during your holiday or stop through the area!
If you plan on staying in the area a while, check out these related articles for some ideas on things to do :)
- Love chocolate? Be sure to check out the wildly popular Chocolate Mill
- Check out 16 things to do in the city of Daylesford here!
- Australia Good Food Guide's recommendations for dinners in Daylesford here!
As always, safe travels and happy procaffinating!
Do you have a favorite cafe in Daylesford? Drop it below!
Coffee For a Cause: Give Back with Each Cup of Coffee
Coffee For A Cause
It’s human nature to want to help someone in need, and with the after effects of COVID-19, where “100 million and 150 million individuals were pushed back into extreme poverty in 2021″, there are plenty of people who could use a a helping hand.
Thankfully, many companies and organizations actively make an effort to give back to those in need whether it be through a 5k fundraiser, matching donations, or donating a percentage of profits.
Coffee For A Cause is one of these companies whose foundation is built on giving back to those in need by helping create a solid foundation for the future.
Coffee For A Cause: A Look into the Company
Coffee For A Cause is an independent coffee company that produces, imports and distributes coffee sourced from Guatemala. Any coffee lover knows that Guatemala is one of the fantastic coffee belt countries, and thus produces some of the best coffee.
They keep great coffee simple by having five main products in which 100% of their net proceeds go to their foundation: A stronger foundation.
- Medium roast (whole coffee beans)
- Medium roast (ground)
- Medium-Dark roast (whole bean)
- Coffee gift box
- A bag of coffee with a custom label
While some companies focus on giving back to first responders, donating to cancer research, or to a local cause, A Stronger Foundation focuses their efforts on leading
the fight for criminal legal system rebuilding. We advocate, educate and innovate around mass incarceration, probation and parole reform
The discussion around mass incarceration and the re-entry of prisoners is not a new one, though it is a very important topic to be discussing. A staggering 77% of those who were incarcerated face re-arrest within five years later after release.
Coffee For A Cause also states that
650,000 individuals are released back into society, most with very little to no resources for a truly successful re-entry
It would be difficult to say that these two statistics aren’t related at all, as ACEF states
prisoners participating in educational programs were siginificantly less like to be rearrested, reconvicted and reincarcerated.
The effects of incarceration can stretch beyond the individual who committed the crime, with the families and children also being affected.
These companies address the issues in the best way possible, with education and creating a good foundation being the number one priority.
Six More Fantastic Coffee Companies that Give Back
Don’t feel like switching to a different coffee supplier? No worries! There are so many coffee brands that give back to a variety of important causes. The six companies below are just a few examples of these.
- Social Impact Coffee:
- Combining quality with sustainability, this company donates 65% of their profits to their local community and pay the farmers they source their coffee from over the fair trade wage!
- BLQK Coffee
- Created by former football player Justin Watson, BLQK coffee supports and donates 25% of profits to black and at risk communities
- Created by former football player Justin Watson, BLQK coffee supports and donates 25% of profits to black and at risk communities
- Ben & Jerry’s
- While they may not make coffee, they do produce some caffeinated ice cream that will make your taste buds dance. The Ben & Jerry’s Foundation operates mainly through providing grants around the U.S.A and Vermont specifically. They have since awarded over $50,000,000 since the creation of the foundation.
- Starbucks
- Yes, that’s right! Having your daily Starbucks coffee is supporting a good cause! The Starbucks Foundation helps make the world a better place through grants that promote women & girl empowerment. The foundation also helps extend access to clean water and gets involved in a variety of youth issues.
- Yes, that’s right! Having your daily Starbucks coffee is supporting a good cause! The Starbucks Foundation helps make the world a better place through grants that promote women & girl empowerment. The foundation also helps extend access to clean water and gets involved in a variety of youth issues.
- Dunkin Donuts
- This iconic coffee stop has sent over 300,000 lbs of coffee overseas to active U.S. military troops in an effort to keep spirits high (and caffeine levels)
- Bellissimo Coffee
- Bellissimo Coffee, an Australian coffee roaster, is partnered with the Mental Awareness Foundation. Whenever you purchase a bag of their Taketime Blend, all proceeds will be dedicated to the foundation to help the fight against mental health issues.
Keep in mind that many local coffee shops also get involved with their community! If you want to make a more local impact, definitely swing by your favourite stop for a morning cup of coffee to see if they give back to the community.
Summary: Giving back with every cup of coffee!
There are so many ways to give back to the community and have a positive impact on the world we live in. If you’re reading this post, then I’m sure you’re on the right path already!
Coffee for a cause is an excellent example of how companies with a larger reach can have a big impact on an important conversation.
Some other great ways to have an amazing cup of coffee that has a positive impact:
- Look for fair trade coffee label
- The fair trade coffee label helps ensure that small farmers are being taken care of. It also ensures that the coffee was farmed in a sustainable way through the creation of water projects, education and more
- Donate cups of coffee via coffee shop credits
- Pay it forward on your next cup of coffee! A great example of this is Bean n Loaf, a cafe located in Australia.
- Use a reuseable coffee cup
- Even if you’re favorite coffee stop isn’t involved in giving back to the community, you can still make an impact on the environment by reducing your waste with a reusable cup!
That’s all for today! Keep on trying to make the world a better place to live in through the things you love. Happy Procaffinating!
What’s your favorite way to give back? Comment it below!
